
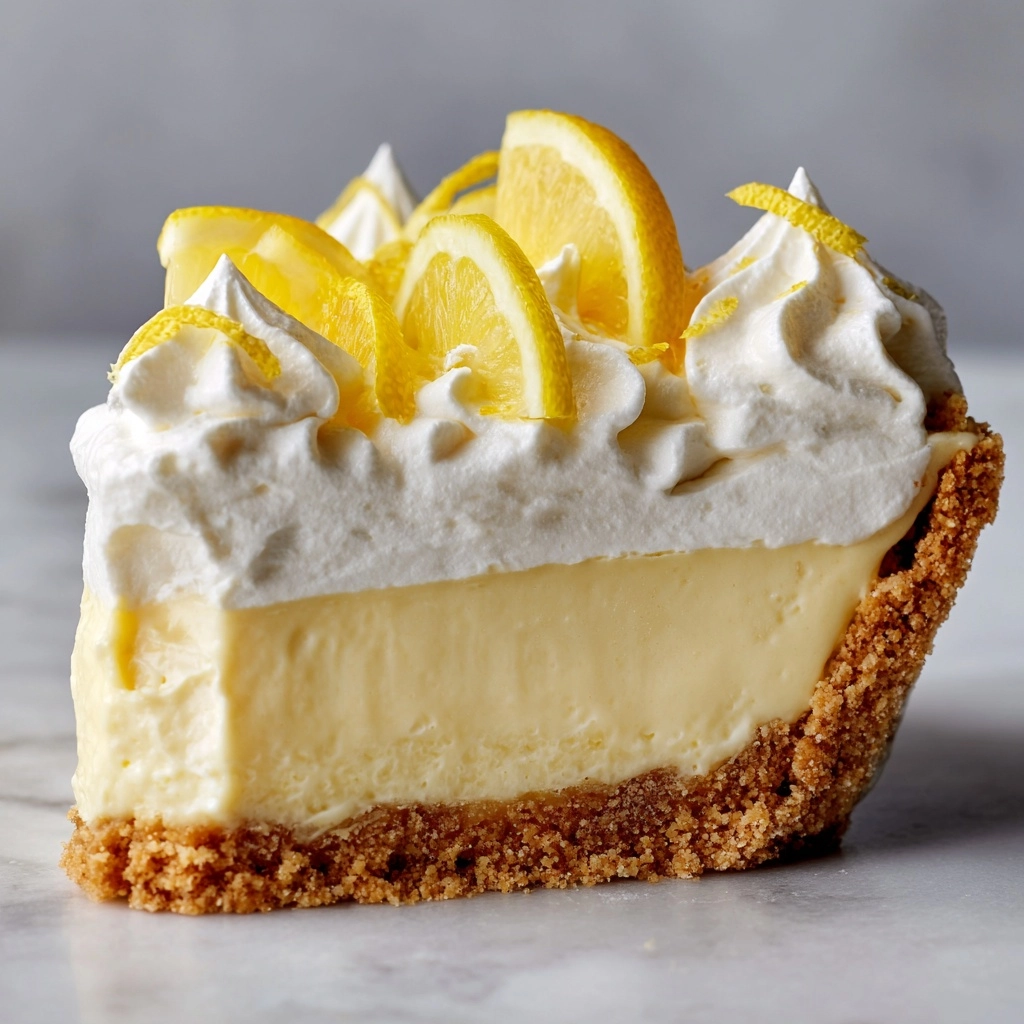
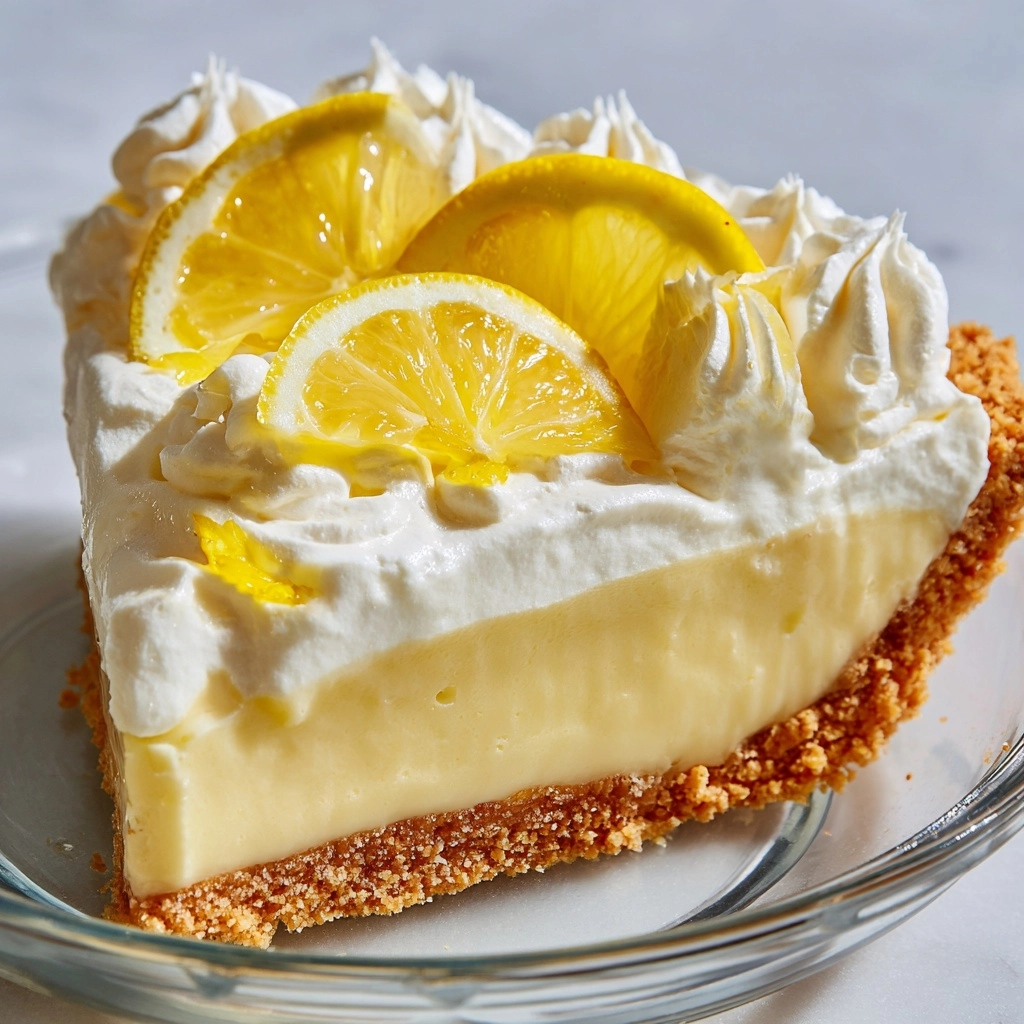
If you’re looking for the ultimate crowd-pleasing summer dessert, let me introduce you to the Refreshing Lemonade Pie. This no-bake treat is a tangy-sweet burst of sunshine in every slice, with a dreamy, creamy filling tucked into a buttery graham cracker crust. It takes only minutes to whip up, and after a short chill in the fridge, you have a pie that’s light, luscious, and packed with bright lemon flavor. Whether you’re hoping to impress at a backyard BBQ or just craving a little lemony lift for your weekday, this easy recipe is destined to become a favorite in your kitchen, too.
Ingredients You’ll Need
-
- 1 9-inch graham cracker crust
- 1 can (14 ounces) sweetened condensed milk
- 1/2 cup frozen lemonade concentrate (thawed)
- 1 teaspoon lemon zest
- 1 container (8 ounces) whipped topping (thawed)
- Lemon slices or whipped cream
Graham Cracker Crust:
Filling:
Garnish (optional):
How to Make Refreshing Lemonade Pie
Step 1: Mix the Filling
Start by grabbing a large mixing bowl, since you’ll need some space for whisking. Whisk together the sweetened condensed milk, thawed lemonade concentrate, and freshly grated lemon zest until everything is silky-smooth and blended. This step ensures your pie is bursting with bright citrus flavor and a creamy, dreamy texture from the very first bite.
Step 2: Fold in the Whipped Topping
Next, grab your thawed whipped topping and gently fold it into the lemon mixture. Don’t over-mix—using a spatula and a gentle hand keeps the filling ultra-light and airy, giving your Refreshing Lemonade Pie that signature cloud-like texture. The goal is to combine everything until it’s just mixed and no streaks remain.
Step 3: Fill the Crust
Now for the fun part: pour your creamy lemon filling right into the graham cracker crust. Use a spatula to spread it evenly and smooth the top, making sure it reaches every edge. This ensures each slice looks (and tastes!) picture-perfect.
Step 4: Chill Until Firm
All that’s left is to cover your pie (a simple layer of plastic wrap works perfectly) and transfer it to the fridge. Let it chill for at least 4 hours—the hardest part is waiting! This allows the filling to set up to the ideal sliceable consistency, so every wedge holds its shape beautifully.
Step 5: Garnish and Serve
When you’re ready to wow your guests (or just yourself), uncover the pie and garnish with lemon slices or an extra swirl of whipped cream. Every slice of Refreshing Lemonade Pie looks so cheerful you’ll find yourself smiling before you even take a bite.
How to Serve Refreshing Lemonade Pie
Garnishes
For gorgeous presentation, top the pie with thinly sliced lemons, extra lemon zest, or delicate swirls of whipped cream. These touches make your Refreshing Lemonade Pie look absolutely irresistible and add another hit of citrus or creaminess to each serving.
Side Dishes
A scoop of fresh berries—think raspberries, strawberries, or blueberries—makes a beautiful and tasty pairing with this zingy pie. Or serve each slice with some iced tea or homemade lemonade for a double dose of refreshment, perfect for a summer gathering.
Creative Ways to Present
If you want to think outside the (pie) box, try making individual servings by spooning the filling into small jars or glasses and topping with crushed graham crackers. Mini Refreshing Lemonade Pie parfaits are perfect for parties, picnics, or picnics by the pool!
Make Ahead and Storage
Storing Leftovers
Any leftover pie should be covered tightly with plastic wrap or aluminum foil and kept in the refrigerator. It’ll stay wonderfully fresh and creamy for up to 3 days, making it a great make-ahead dessert for busy weeks or last-minute cravings.
Freezing
For an extra-frosty treat, you can freeze your Refreshing Lemonade Pie! Just wrap it securely (either whole or in individual slices) and pop it in the freezer for up to 1 month. Let it sit at room temperature for about 10 minutes before slicing for perfectly creamy, chilled results.
Reheating
Since this pie is meant to be enjoyed cold, there’s no need to reheat. If you’ve frozen the pie, resting at room temperature for several minutes will soften it just enough for easy slicing and serving.
FAQs
Can I use fresh lemon juice instead of lemonade concentrate?
While you can experiment with fresh lemon juice for an extra punch of tartness, the frozen lemonade concentrate is what provides that classic bright and just-sweet-enough flavor in Refreshing Lemonade Pie. You might need to tweak the sugar if substituting, as the concentrate is both tart and sweet.
How do I keep the pie from getting watery?
Make sure your whipped topping is fully thawed but not melted, and always chill the pie for at least four hours. The chilling step lets the filling set up properly so your Refreshing Lemonade Pie is creamy and sliceable, never watery.
Can I make this pie gluten-free?
Absolutely—pick up a gluten-free graham cracker crust, which is widely available at most grocery stores. The rest of the ingredients are already gluten-free, so you won’t miss out on anything!
What’s the best way to zest a lemon?
Use a microplane or fine grater for zesting lemons—it quickly pulls the flavorful yellow outer layer, avoiding the bitter white pith. If you don’t have one, a vegetable peeler and a quick chop will do the trick.
How far in advance can I make Refreshing Lemonade Pie?
This pie is actually even better when made ahead! Prepare it the night before, let it chill overnight, then garnish right before serving. It’s ready to shine whenever the craving strikes.
Final Thoughts
There’s something just magical about a dessert that’s so simple yet so delightful—every bite of Refreshing Lemonade Pie is like a sunny day on a plate. I truly hope you’ll give this recipe a try and share it with people you love. Happy baking, and enjoy every zesty, creamy spoonful!
Print
Refreshing Lemonade Pie Recipe
- Prep Time: 10 minutes
- Cook Time: 0 minutes
- Total Time: 4 hours 10 minutes (includes chilling)
- Yield: 8 servings
- Category: Dessert
- Method: No-Bake
- Cuisine: American
- Diet: Non-Vegetarian
Description
Indulge in the delightful tanginess and creamy texture of this Refreshing Lemonade Pie. A simple no-bake dessert that perfectly captures the essence of summer in every slice.
Ingredients
- 1 9-inch graham cracker crust
- 1 can (14 ounces) sweetened condensed milk
- 1/2 cup frozen lemonade concentrate (thawed)
- 1 teaspoon lemon zest
- 1 container (8 ounces) whipped topping (thawed)
- Lemon slices or whipped cream
Graham Cracker Crust:
Filling:
Garnish (optional):
Instructions
- Prepare Filling: In a large bowl, whisk together sweetened condensed milk, thawed lemonade concentrate, and lemon zest until smooth.
- Combine with Topping: Gently fold in whipped topping until evenly mixed.
- Fill Crust: Pour the filling into graham cracker crust, smoothing the top.
- Chill: Cover and refrigerate for at least 4 hours or until firm.
- Garnish and Serve: Add lemon slices or whipped cream before serving, if desired.
Notes
- For a tangier taste, add 1 tablespoon of fresh lemon juice.
- Freeze for a firmer texture, then let sit at room temperature for 10 minutes before slicing.
Nutrition
- Serving Size: 1 slice
- Calories: 310
- Sugar: 27g
- Sodium: 160mg
- Fat: 14g
- Saturated Fat: 8g
- Unsaturated Fat: 5g
- Trans Fat: 0g
- Carbohydrates: 41g
- Fiber: 0g
- Protein: 4g
- Cholesterol: 25mg


