
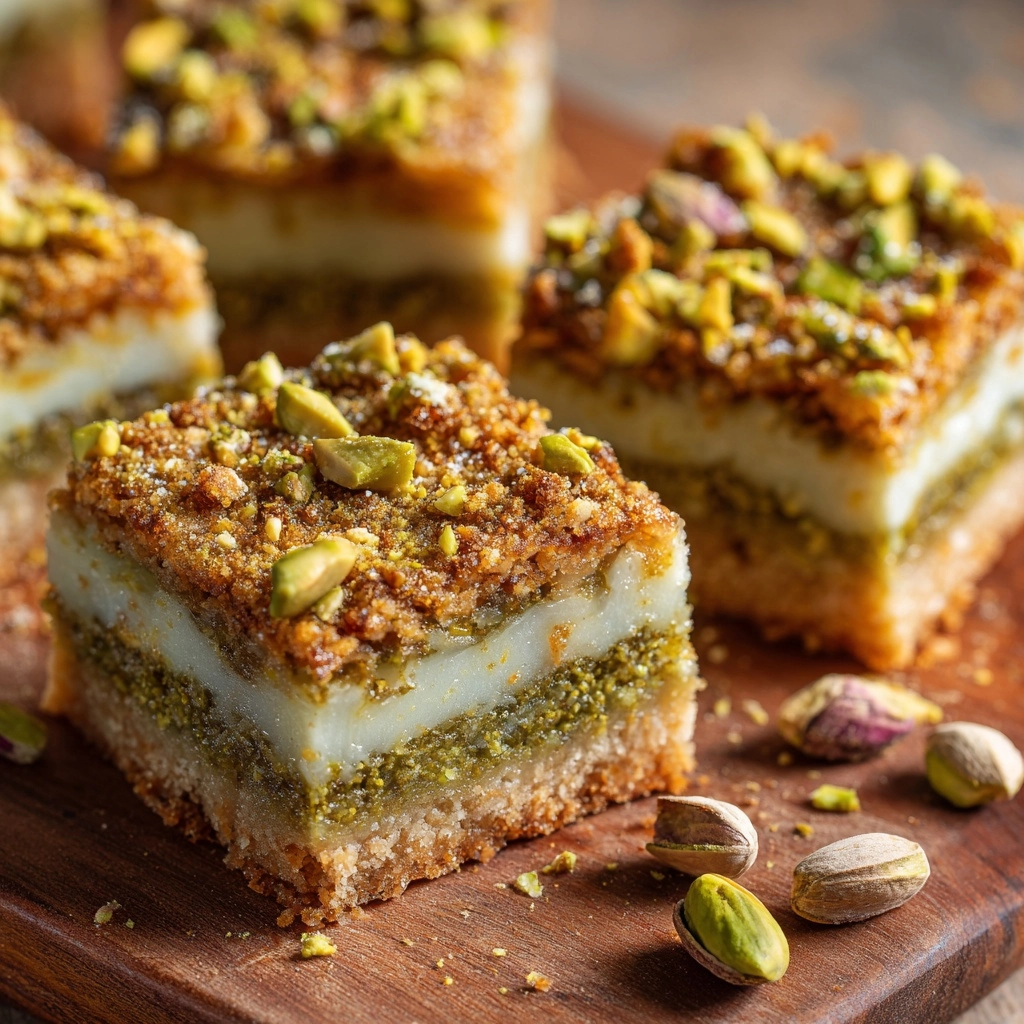
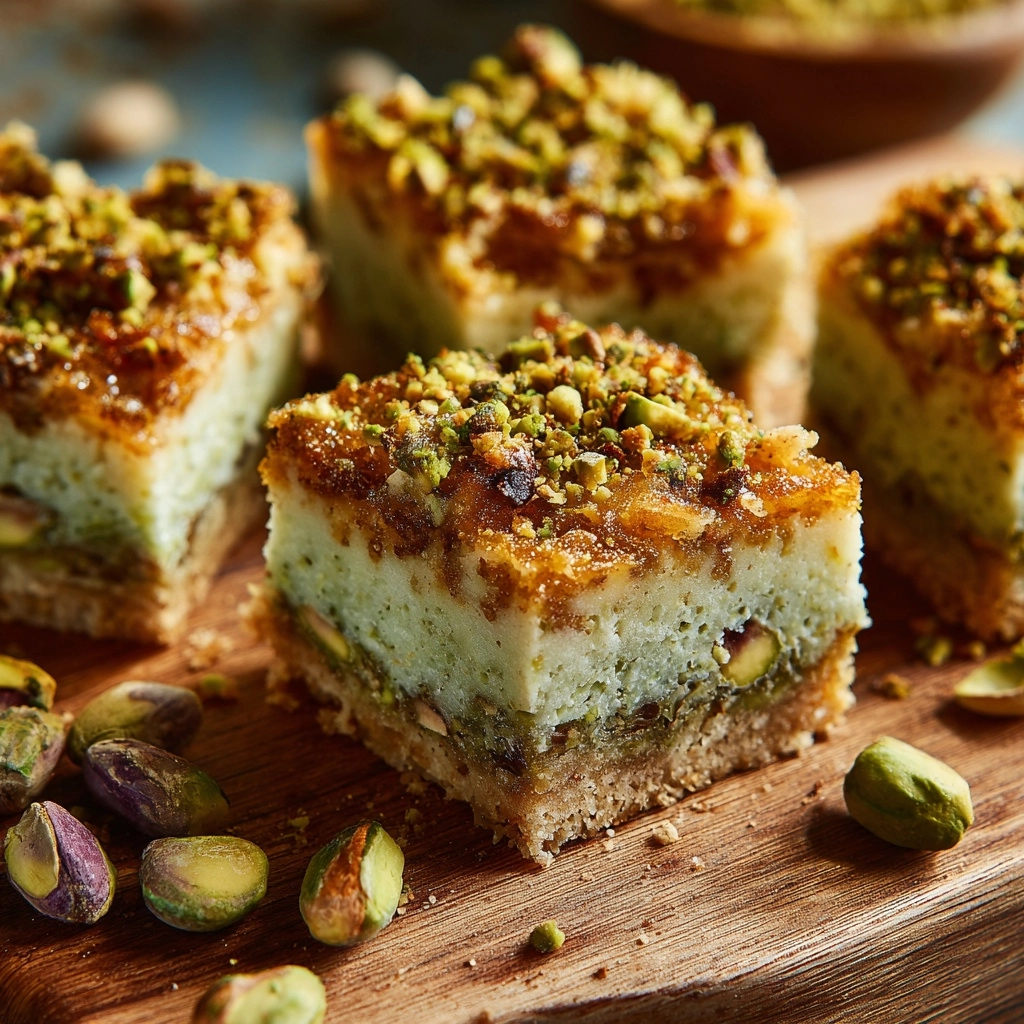
If you’ve been looking for a delightfully unique no-bake treat, let me introduce you to Pistachio Dream Cookie Bars. These luscious bars sit somewhere between a creamy cheesecake and a cookie bar, with swirls of pistachio, a buttery graham cracker base, and a cloud of whipped topping. The gorgeous soft green hue, nutty crunch, and melt-in-your-mouth layers make this dessert a total standout, whether you’re sharing with friends or indulging all on your own!
Ingredients You’ll Need
The beauty of these Pistachio Dream Cookie Bars lies in their easy-to-find ingredients. Each element was chosen to bring maximum flavor, effortless texture, and that irresistible “one more bite” factor to every single bar. Here’s what you’ll need and why it matters:
- Graham cracker crumbs: The toasty, honeyed crunch that forms the perfect sturdy base for all your creamy layers.
- Unsalted butter, melted: Holds the crust together and gives a rich, indulgent flavor from the very start.
- Instant pistachio pudding mix: The star of the show for flavor and that signature pastel green color that makes these bars pop.
- Cold milk: Activates the pudding, transforming it into a lush, spoonable filling.
- Cream cheese, softened: Adds tangy creaminess, making the bars taste like a dream pie-meets-cheesecake hybrid.
- Powdered sugar: Sweetens and smooths out the cream cheese, so you get a velvety, never-grainy bite.
- Whipped topping (like Cool Whip), thawed: Brings lightness to the filling and makes for a pillowy soft finish on top.
- Chopped pistachios: Adds a gorgeous appearance and a nutty, crunchy contrast to all that silkiness.
- Optional green food coloring: For those who love a vibrant, bakery-worthy look, just a drop or two amps up the color.
How to Make Pistachio Dream Cookie Bars
Step 1: Make the Graham Cracker Crust
Start by mixing your graham cracker crumbs with melted butter in a medium bowl. Stir until every crumb is moistened, then press the mixture firmly into a 9×9-inch baking dish. This creates that delightfully buttery, crunchy foundation—which totally holds its own beneath the creamy filling. Pop the dish in your fridge while you move on to the next step; a quick chill sets the crust just enough to make layering easy.
Step 2: Prepare the Pistachio Pudding
In a large bowl, whisk the instant pistachio pudding mix with the cold milk. Whisk vigorously for about two minutes until the mixture thickens up like soft pudding. This step guarantees that every bite is full of that authentic pistachio punch, and it’ll soon become the heart of your Pistachio Dream Cookie Bars.
Step 3: Beat the Cream Cheese and Sugar
In a separate bowl, use an electric mixer or sturdy whisk to beat together your softened cream cheese and powdered sugar until silky smooth. This not only softens the tang of the cream cheese, but gives you a fluffy, sweet base to fold your pudding into. No lumps allowed here—you want a dreamy, cheesecake-like filling.
Step 4: Combine the Filling
Now comes the fun part: fold your thickened pistachio pudding into the cream cheese mixture until fully blended. Add half of your whipped topping by gently folding it in, being careful to keep things light and airy. Don’t over-mix—just combine until everything is pale green and luscious.
Step 5: Assemble the Layers
Spread your pistachio-cream filling evenly over the chilled graham crust, smoothing it out into every corner. Then, top it all off with the remaining whipped topping, creating a creamy white cloud. Sprinkle your chopped pistachios all over the top for crunch, color, and irresistible appeal. If you’re craving a brighter color, add a drop of green food coloring to the filling before spreading it.
Step 6: Chill and Slice
The hardest part—waiting! Chill your completed Pistachio Dream Cookie Bars for at least 4 hours. This lets the flavors mingle and the filling set just right. Once thoroughly chilled, slice into nine generous bars, serve cold, and enjoy every stunning, luscious bite.
How to Serve Pistachio Dream Cookie Bars
Garnishes
Don’t hold back on those finishing touches! Beyond the chopped pistachios, consider dusting each bar with a little extra powdered sugar, or shaving white chocolate over the top for an eye-catching and decadent garnish. If you’re feeling fancy, add a few edible flowers or a tiny mint sprig for a bakery-level flourish.
Side Dishes
Pistachio Dream Cookie Bars are rich enough to stand alone, but if you want to round out your dessert table, consider a bowl of fresh berries or a scoop of vanilla ice cream on the side. The tangy tartness of berries or the cool creaminess of ice cream pairs beautifully with the nutty, silky flavors of the bars.
Creative Ways to Present
For parties or potlucks, try cutting the bars into bite-sized squares and serving on a pretty platter. Individually wrap bars in wax paper for a sweet favor at showers, or layer pieces in parfait glasses with extra whipped topping and pistachios for a fun, deconstructed trifle. The vibrant green color makes them perfect for spring celebrations, St. Patrick’s Day, or any gathering that needs a pop of cheerful color!
Make Ahead and Storage
Storing Leftovers
Once you’ve enjoyed your first round of Pistachio Dream Cookie Bars (no judgment if you go back for seconds), store any leftovers tightly covered in the refrigerator. They’ll keep for up to five days, and honestly, they might taste even better after all the flavors have had more time together!
Freezing
If you want to keep a stash on hand for future dessert cravings, these bars freeze surprisingly well. Cut them into bars, and layer in a single layer between sheets of parchment paper in an airtight container. Freeze for up to two months—the creamy texture holds up beautifully after thawing in the fridge overnight.
Reheating
No microwave needed here! Pistachio Dream Cookie Bars are best served chilled straight from the fridge, so there’s no need to reheat. Just let them sit at room temperature for a few minutes if you prefer a slightly softer texture.
FAQs
Can I use homemade whipped cream instead of whipped topping?
Absolutely! While store-bought whipped topping makes things quick and reliable, homemade whipped cream (beaten to soft peaks with a little sugar) adds a rich, fresh flavor. Just be sure not to overwhip so your filling stays light and fluffy.
Can I substitute the pistachio pudding mix for something else?
If pistachio isn’t your thing or you’re feeling adventurous, you can swap in other instant pudding flavors like vanilla or chocolate. The texture will remain the same, but you’ll end up with a deliciously different flavor profile—get creative!
Can I make Pistachio Dream Cookie Bars in advance?
Yes, and it’s actually encouraged! These bars need time to chill and set, making them a perfect make-ahead dessert for busy gatherings or parties. Just keep them covered in the fridge until you’re ready to serve.
What kind of crust can I use instead of graham crackers?
Shortbread or vanilla wafer crumbs both make fantastic alternatives to graham crackers. Each gives a slightly different sweetness and crunch, letting you tailor the base to your tastes or whatever you have on hand.
How do I get that beautiful green color if my pudding isn’t bright enough?
If you want each batch of Pistachio Dream Cookie Bars to truly pop, just add a drop or two of green food coloring to your pudding mixture before layering. Gel food coloring works best for vibrant color, but liquid drops will do in a pinch—just add slowly and mix well so you don’t overdo it.
Final Thoughts
Don’t be surprised if these Pistachio Dream Cookie Bars become the talk of your next get-together. With their playful color, creamy layers, and nutty crunch, these treats pack joy into every single bite. If you’re ready to brighten up your dessert table and wow your family and friends, this dreamy recipe is the place to start!
Print
Pistachio Dream Cookie Bars Recipe
- Prep Time: 20 minutes
- Cook Time: 0 minutes
- Total Time: 4 hours 20 minutes (including chilling)
- Yield: 9 bars
- Category: Dessert
- Method: No-Bake
- Cuisine: American
- Diet: Non-Vegetarian
Description
Indulge in the creamy and dreamy delight of Pistachio Dream Cookie Bars. These no-bake bars feature a luscious pistachio filling on a buttery graham cracker crust, topped with whipped topping and chopped pistachios.
Ingredients
For the Crust:
- 1 1/2 cups graham cracker crumbs
- 1/2 cup unsalted butter, melted
For the Filling:
- 1 package (3.4 oz) instant pistachio pudding mix
- 1 1/2 cups cold milk
- 8 oz cream cheese, softened
- 1/2 cup powdered sugar
- 8 oz whipped topping (like Cool Whip), thawed
- 1/2 cup chopped pistachios
- optional green food coloring
Instructions
- Prepare the Crust: In a medium bowl, mix graham cracker crumbs and melted butter. Press into a 9×9-inch baking dish to form a crust. Refrigerate.
- Make the Filling: Whisk pistachio pudding mix and milk until thickened. Beat cream cheese and powdered sugar until smooth. Fold in the pudding mix and half of the whipped topping.
- Assemble: Spread filling over the crust. Top with remaining whipped topping and chopped pistachios.
- Chill: Refrigerate for at least 4 hours until set. Slice and serve cold.
Notes
- For a brighter green color, add a drop of green food coloring to the pudding mixture.
- You can use a shortbread or vanilla wafer crust as a variation.
Nutrition
- Serving Size: 1 bar
- Calories: 290
- Sugar: 17g
- Sodium: 210mg
- Fat: 18g
- Saturated Fat: 9g
- Unsaturated Fat: 7g
- Trans Fat: 0g
- Carbohydrates: 28g
- Fiber: 1g
- Protein: 3g
- Cholesterol: 30mg
