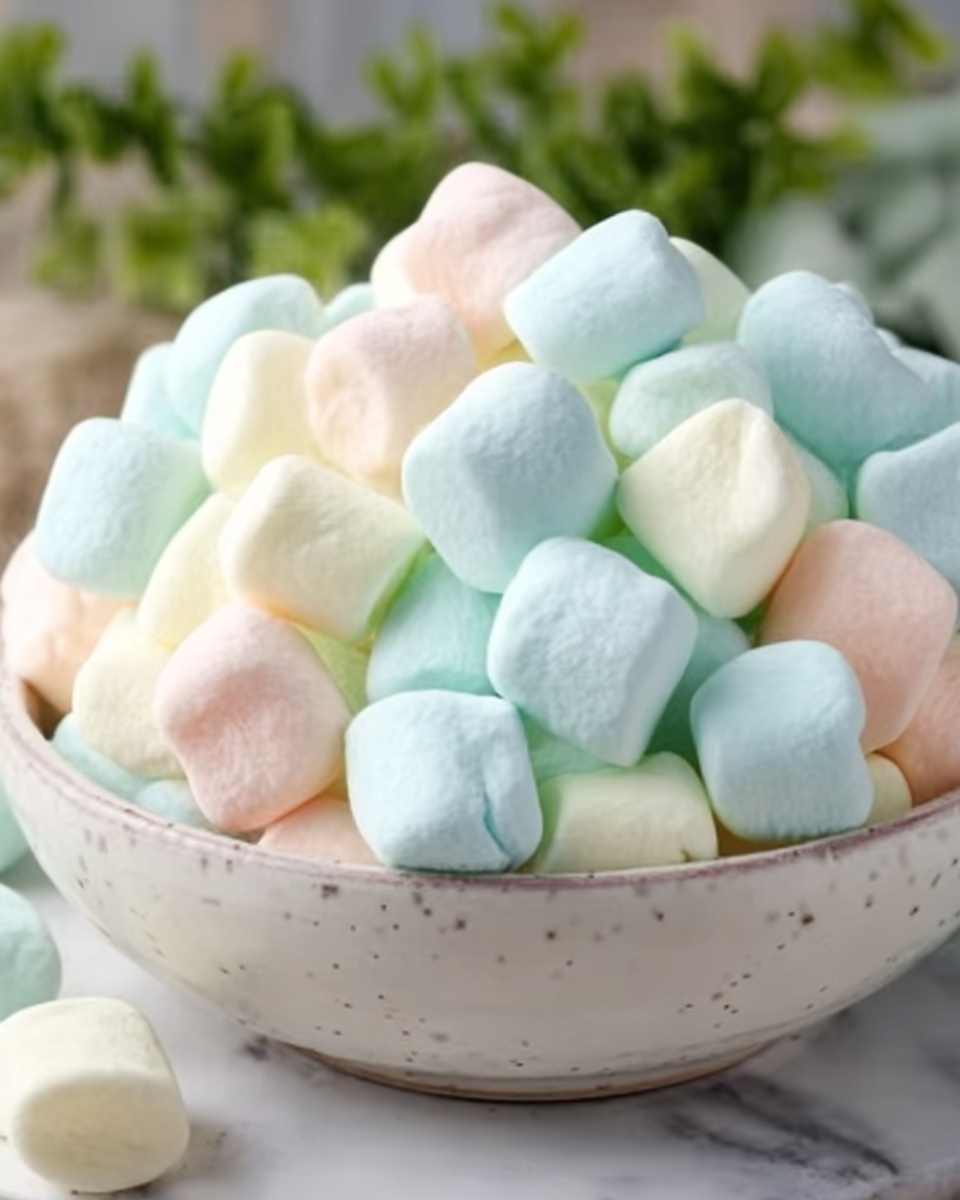
If you’re craving a classic treat that’s sweet, buttery, and refreshingly minty, then you’ve absolutely got to try this Homemade Peppermint Butter Mints Recipe. These delightful little mints melt in your mouth with a perfect balance of creamy butter and crisp peppermint flavor, plus they come out looking just as charming as they taste. Whether you want a festive favor for holiday gatherings or a comforting sweet to nibble on anytime, this recipe is an irresistible crowd-pleaser that’s surprisingly easy to make at home.
Ingredients You’ll Need
The beauty of this Homemade Peppermint Butter Mints Recipe lies in its simplicity. Each ingredient plays a starring role, from the rich, creamy butter that gives the mints their smooth texture to the peppermint extract that provides their signature refreshing zing. With only a handful of essentials, this recipe is a breeze to whip up and delivers brilliant results every time.
- Unsalted butter (1 stick, softened): The creamy base that makes these mints melt in your mouth, so be sure it’s fully softened for easy mixing.
- Whipping cream (1 tablespoon): Adds a little richness and helps the dough come together smoothly without being too sticky.
- Powdered sugar (4 cups, divided): Provides sweetness and the perfect texture; dusting extra sugar helps prevent sticking while shaping.
- Pure peppermint extract (½ teaspoon): This is where the mints get their fresh, cool, unmistakable flavor—quality extract makes a difference.
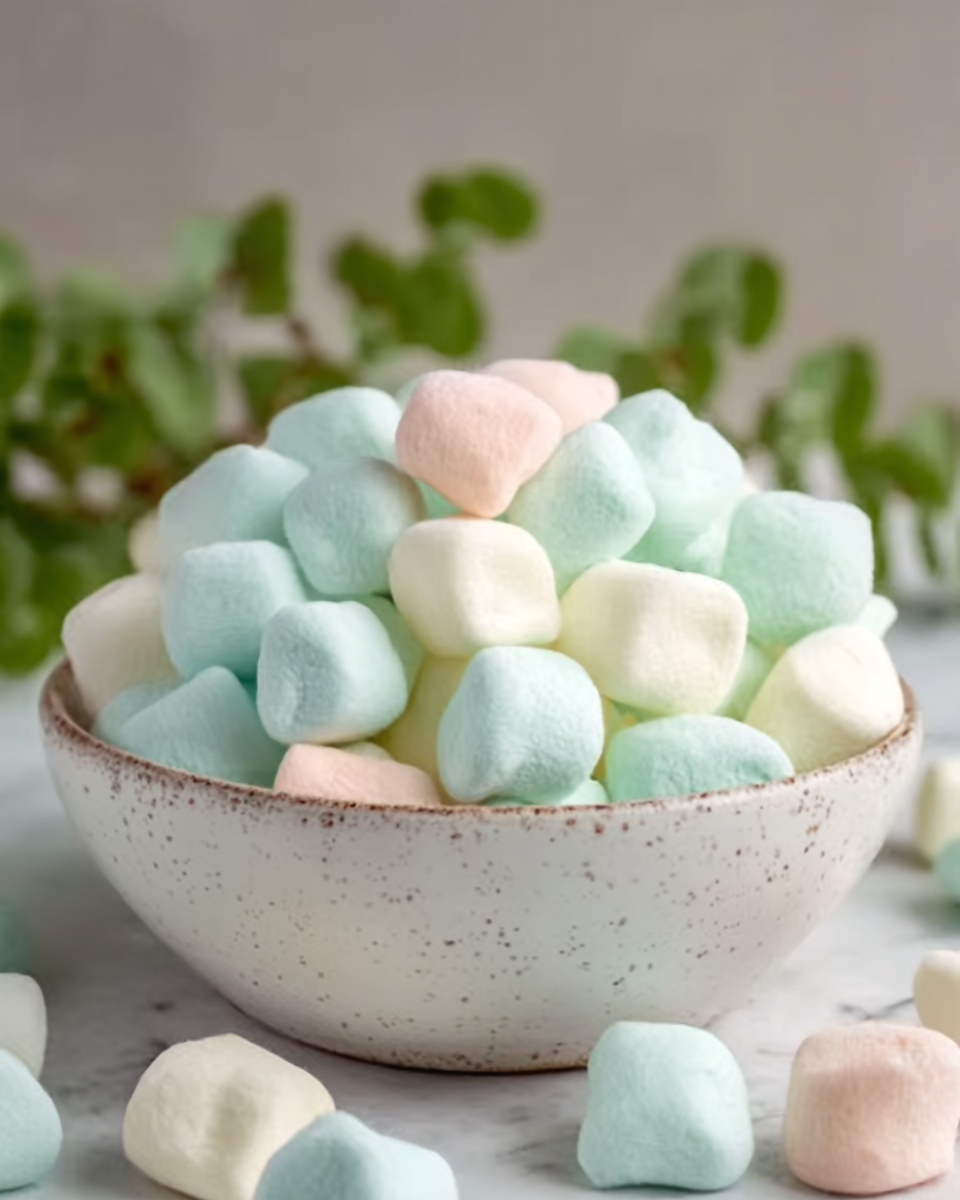
- Food coloring (1-4 drops per color): Optional, but highly recommended for bright, festive hues that make these mints as pretty as they are tasty.
How to Make Homemade Peppermint Butter Mints Recipe
Step 1: Cream the Ingredients
Start by softly creaming together your unsalted butter, whipping cream, 1 cup of powdered sugar, and peppermint extract using a stand mixer or hand mixer. This step is essential to blend the flavors well and create a smooth, fluffy base for the mints. Keep mixing until the mixture looks silky and fully combined.
Step 2: Add Powdered Sugar Gradually
Once the initial batch is smooth, scrape down the sides of the bowl and add the powdered sugar in small increments, about one cup at a time. This slow incorporation helps the dough develop a firm yet pliable consistency that is easy to shape. Continue this process until all the sugar is mixed in and the dough starts to pull away from the bowl’s sides.
Step 3: Divide the Dough
If you want to create a variety of colorful mints, divide the dough evenly into portions. Wrapping each section tightly in plastic wrap keeps the dough from drying out before you add the colors. Using a kitchen scale can really help keep the portions uniform for neat, consistent mints.
Step 4: Color the Dough
Add 1 to 4 drops of your favorite food coloring to each wrapped dough portion. Knead each one thoroughly until the color is evenly mixed throughout. Then, wrap them back up and chill in the fridge for about an hour—this helps the dough firm up and makes it easier to roll out later.
Step 5: Shape the Mints
Sprinkle powdered sugar generously on your work surface to keep things from sticking, then take one dough portion and roll it into a rope about half an inch thick. Use a sharp knife or dough scraper to cut the ropes into bite-sized mint pieces. This hands-on part is so satisfying, watching the colorful little mints take shape!
Step 6: Dry the Mints
Place your cut mints on a baking sheet or clean cutting board and let them dry at room temperature for around 12 hours. This drying period is key to developing the perfect firm-but-tender texture that makes these butter mints so addictive. Patience really pays off here!
Step 7: Store the Mints
After they have fully dried, store your beautiful homemade mints in an airtight container at room temperature. They will stay fresh and flavorful for up to two weeks, making them perfect to prepare in advance for holiday treats or special occasions.
How to Serve Homemade Peppermint Butter Mints Recipe

Garnishes
Add a personal touch by placing your mints in small decorative bowls or wrapping them individually in festive cellophane bags tied with a ribbon. You can also sprinkle them with a tiny bit of sparkling sugar for an extra sparkle that catches the light beautifully.
Side Dishes
These butter mints are a wonderful companion to a hot cup of coffee or tea. Their refreshing peppermint flavor complements the bitterness of coffee perfectly, or you can enjoy them alongside holiday cookies or a rich chocolate dessert for a complete sweet experience.
Creative Ways to Present
If you want to get creative, try layering different colored mints in clear glass jars or holiday-themed tins. They also make charming edible gifts when packaged in small boxes or mason jars and topped with cute hand-written labels featuring the Homemade Peppermint Butter Mints Recipe.
Make Ahead and Storage
Storing Leftovers
Keep your leftover mints in an airtight container in a cool, dry place so they don’t absorb moisture or odors. Proper storage can keep them fresh and delicious for up to two weeks after making, so no need to rush through the batch!
Freezing
If you want to save these mints for longer, you can freeze them. Layer the mints between parchment paper in an airtight container or freezer bag to prevent them from sticking together. When you’re ready to enjoy, allow them to thaw at room temperature before serving.
Reheating
Because these mints are best served cool and firm, reheating is not recommended. Just let frozen mints come to room temperature naturally, and they will regain their delightful texture and flavor perfectly.
FAQs
Can I use salted butter instead of unsalted?
It’s best to use unsalted butter for this recipe so you can control the sweetness and keep the mints from tasting too salty. Salted butter might overwhelm the delicate peppermint flavor.
How strong is the peppermint flavor?
The peppermint extract provides a refreshing but balanced flavor, not overpowering. You can adjust the amount slightly if you prefer a milder or more intense minty taste.
Can I make these mints without food coloring?
Absolutely! The mints will still taste wonderful without coloring. Using food coloring is just a fun way to add a festive or personalized look to your batch.
How long do these mints last?
Stored properly in an airtight container at room temperature, the mints stay fresh and tasty for about two weeks. Beyond that, they may start to lose their texture and flavor.
Is it okay to roll the dough thicker or thinner?
You can adjust the thickness based on your preference, but a half-inch thickness is ideal for mints that balance chewiness and melt-in-your-mouth smoothness. Thinner mints will be more fragile, and thicker ones might be chewier.
Final Thoughts
I can’t recommend this Homemade Peppermint Butter Mints Recipe enough. It’s such a joyful way to fill your home with sweet, festive aromas, and the final product is as delicious as it is charming. Whether you’re making them for yourself or sharing with friends and family, these little mints are guaranteed to bring smiles and a little magic to any occasion. So go ahead—gather your ingredients, roll up your sleeves, and enjoy this wonderful, buttery peppermint treat!
Print
Homemade Peppermint Butter Mints Recipe
- Prep Time: 30 minutes
- Cook Time: 0 minutes
- Total Time: 12 hours 30 minutes
- Yield: 20 servings
- Category: Candy
- Method: No-Cook
- Cuisine: American
Description
Homemade Butter Mints are a classic sweet holiday treat featuring a creamy, melt-in-your-mouth texture infused with pure peppermint flavor. These easy-to-make candies combine softened butter, whipping cream, and powdered sugar, colored lightly for a festive appearance. They require no baking and simply dry overnight, making them a perfect no-cook confection to prepare ahead for holiday gatherings.
Ingredients
Main Ingredients
- 1 stick unsalted butter (softened)
- 1 tablespoon whipping cream
- 4 cups powdered sugar (divided, plus more for dusting)
- ½ teaspoon pure peppermint extract
- 1–4 drops food coloring (or more for brighter colors)
Instructions
- Cream the Ingredients: In the bowl of a stand mixer, beat together the softened unsalted butter, whipping cream, 1 cup of powdered sugar, and peppermint extract until the mixture is smooth and creamy.
- Add Sugar Gradually: Scrape down any mixture stuck to the sides of the bowl. Add another cup of powdered sugar and continue mixing. Repeat this process of adding powdered sugar in increments and mixing until all 4 cups are fully incorporated and the dough starts to pull away from the sides of the bowl, forming a pliable dough.
- Divide the Dough: For multiple colors, weigh the dough and divide it evenly into portions. Wrap each portion tightly in plastic wrap to prevent drying out.
- Color the Dough: Take one dough portion and add 1-4 drops of food coloring. Knead the dough to evenly distribute the color, then rewrap and chill in the refrigerator for 1 hour. Repeat for remaining dough portions and colors.
- Shape the Mints: Dust a cutting board lightly with powdered sugar. Roll each colored dough portion into a rope approximately ½ inch thick. Using a sharp knife or dough scraper, cut the ropes into bite-sized pieces.
- Dry the Mints: Place the cut pieces on the cutting board or on a baking sheet. Allow them to air dry at room temperature for about 12 hours to set and firm up.
- Store the Mints: Once dry, store the butter mints in an airtight container at room temperature. They will keep fresh for up to 2 weeks.
Notes
- Ensure the butter is softened to room temperature for easier mixing.
- Use powdered sugar for a smooth texture and to help the mints set properly.
- Adjust the amount of food coloring to achieve desired tint intensity.
- Drying time is essential to firm the mints; do not skip the 12-hour drying period.
- Butter mints are best enjoyed within two weeks for optimal freshness.
- You can wrap individual mints in wax paper for gifting or presentation.


