
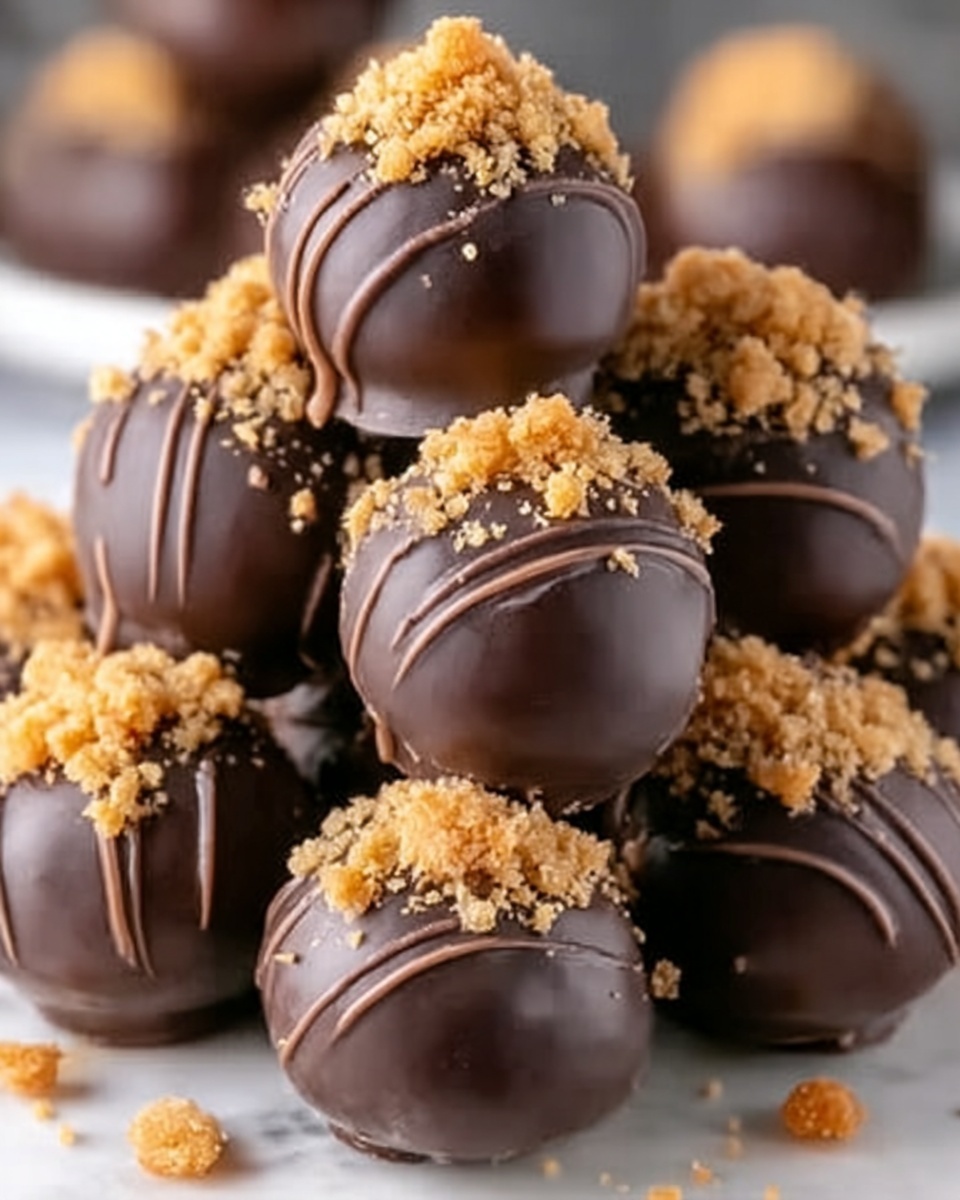
If you have a sweet tooth and love a dessert that’s both indulgent and delightfully crunchy, then you’re absolutely going to fall in love with this Easy Butterfinger Balls Recipe. These bite-sized treats combine the creamy richness of cream cheese with the unmistakable crunch of crushed Butterfinger candy bars, all wrapped in a luscious chocolate shell. Whether you’re making them for a holiday party, a cozy night in, or just to satisfy a sudden craving, these balls pack a punch of flavor and texture that’s simply irresistible. Plus, they are surprisingly easy to make, which means you can enjoy gourmet-worthy snacks without spending hours in the kitchen.
Ingredients You’ll Need
This Easy Butterfinger Balls Recipe calls for a handful of simple ingredients that unite to create a marvelous balance of taste and texture. Each item plays an essential role, from creamy to crunchy to sweet, giving these treats their signature charm.
- Butterfinger candy bars (2 cups crushed): Adds that crunchy, peanut-buttery texture and flavor that makes these balls so unique.
- Cream cheese (1 8-ounce package, softened): Provides a smooth, tangy creaminess that binds everything together.
- Powdered sugar (2 cups): Sweetens the mixture without graininess for that melt-in-your-mouth softness.
- Vanilla extract (1 teaspoon): Enhances all the flavors with a subtle, warm note.
- Semi-sweet chocolate chips (2 cups): Creates a rich, glossy coating that perfectly complements the filling.
- Coconut or vegetable oil (1 tablespoon, optional): Helps smooth out the melted chocolate for a beautiful, shiny finish.
How to Make Easy Butterfinger Balls Recipe
Step 1: Prepare the Filling
Start by softening the cream cheese to ensure your mixture blends easily. Beat the cream cheese with powdered sugar and vanilla extract until it’s silky smooth and fully combined. This base is rich and creamy, which balances perfectly with the crunchy candy you’ll add next.
Step 2: Fold in the Crushed Butterfinger
Gently fold in the crushed Butterfinger candy bars into the cream cheese mixture. Take your time to maintain the candy’s crunch while evenly distributing it throughout the creamy base. This step is crucial because it defines the texture your Easy Butterfinger Balls Recipe is known for.
Step 3: Form the Balls
Once combined, roll the mixture into 1-inch balls using your hands or a small cookie scoop for even sizing. Place each ball on a baking sheet lined with parchment paper—this prevents sticking and makes cleanup a breeze. Then pop the tray into the freezer for about 30 minutes; chilling them will help the balls hold their shape during dipping.
Step 4: Melt the Chocolate
In a microwave-safe bowl, melt the semi-sweet chocolate chips in 20-second increments, stirring well after each to avoid burning. For the creamiest, smoothest texture, stir in a tablespoon of coconut or vegetable oil here. This step ensures that your chocolate coating will be glossy and easy to work with.
Step 5: Coat the Butterfinger Balls
Remove the chilled balls from the freezer and dip each one fully into the melted chocolate using a fork or dipping tool. Make sure each is completely covered to seal in the delicious filling. Return the coated balls to the parchment-lined tray and prepare them for final chilling.
Step 6: Chill and Serve
Place the dipped balls in the refrigerator for 10 to 15 minutes, or until the chocolate has firmly set. This final step locks in all those wonderful textures and flavors, giving you perfectly finished Easy Butterfinger Balls ready to enjoy or gift!
How to Serve Easy Butterfinger Balls Recipe
Garnishes
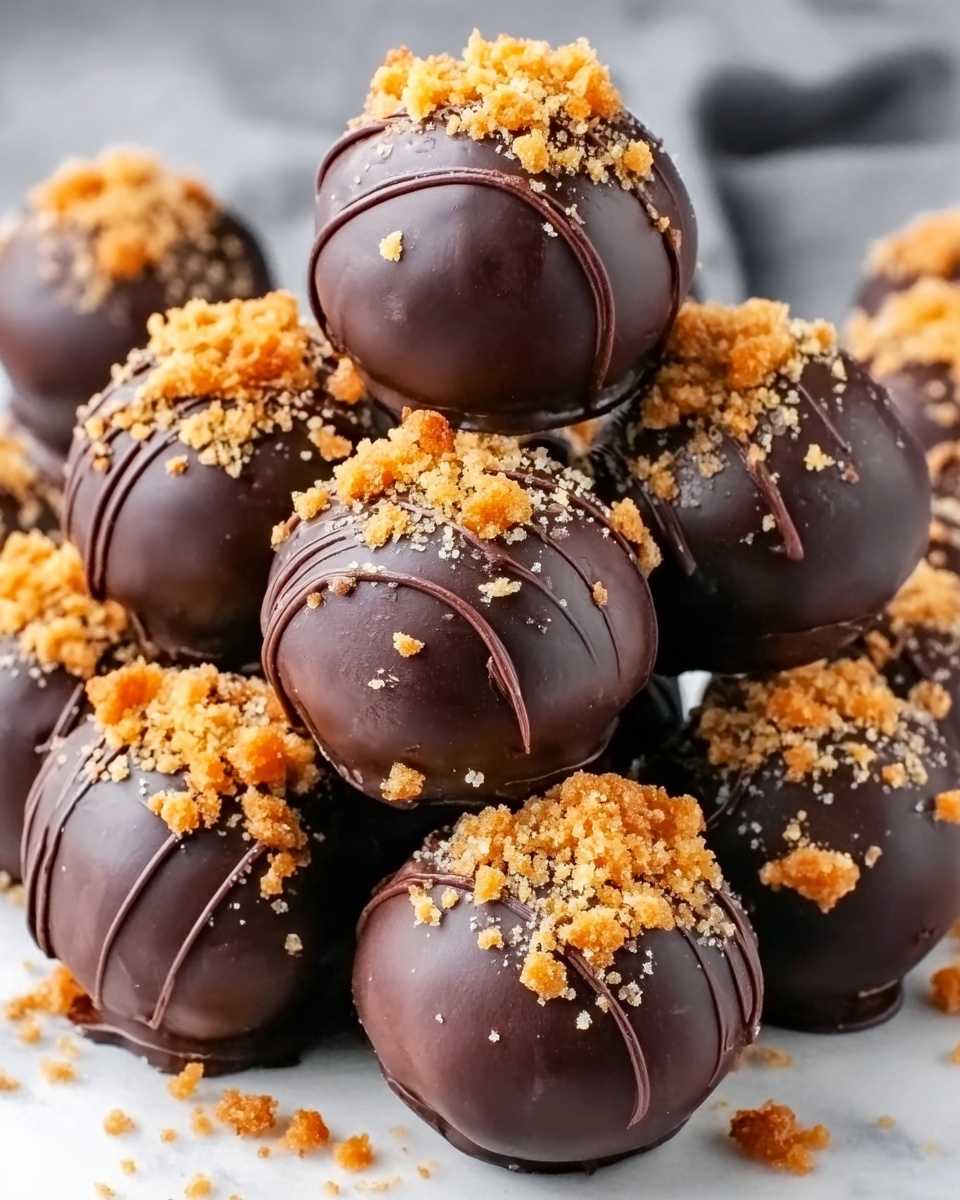
Want to elevate your Easy Butterfinger Balls Recipe even further? Sprinkle a tiny pinch of sea salt or crushed Butterfinger pieces on the top before the chocolate sets. You can also add a drizzle of white chocolate or some colorful sprinkles for a fun, festive look that’s sure to draw compliments.
Side Dishes
These butterfinger balls are fantastic served alongside a hot cup of coffee or a glass of cold milk to balance their richness. They also pair well with fresh berries which provide a refreshing counterpoint to the sweet and chocolatey bites.
Creative Ways to Present
If you’re bringing these treats to a party or gifting them, consider arranging them in holiday-themed cupcake liners or a decorative box tied with a beautiful ribbon. Layering with parchment paper between rows can keep them neat and charmingly displayed. Presentation adds that extra special touch, making them irresistible even before anyone takes a bite!
Make Ahead and Storage
Storing Leftovers
Leftover Easy Butterfinger Balls keep wonderfully in an airtight container stored in the refrigerator. They’ll maintain their flavor and texture for up to one week, making them a perfect make-ahead snack or dessert option.
Freezing
You can freeze these little delights for longer storage. Arrange them in a single layer on a baking sheet to freeze individually, then transfer to a freezer-safe container or bag. They’ll keep beautifully for up to three months.
Reheating
When ready to enjoy, simply thaw the frozen balls in the refrigerator overnight. If you want the chocolate coating to regain its shine, briefly microwave at a low power in short bursts, taking care not to melt the chocolate entirely. This way, they taste freshly made every time!
FAQs
Can I use a different candy bar instead of Butterfinger?
Absolutely! While Butterfinger bars give unique texture and flavor, you can experiment with other crunchy candy bars like Twix or Heath for a different but just as delicious twist.
Is it okay to substitute cream cheese for something else?
Cream cheese provides creaminess and tang that are key to these balls. However, for a dairy-free option, you could try a vegan cream cheese substitute, but keep in mind the flavor and texture might differ slightly.
Do I have to use semi-sweet chocolate chips?
Not at all. You can use milk, dark, or even white chocolate chips to coat your Butterfinger balls depending on your sweetness preference. Just remember that each chocolate type will give a slightly different flavor profile.
How do I crush the Butterfinger bars without making a mess?
Place the candy bars in a zip-top bag and gently crush them with a rolling pin or a heavy pan. This method keeps the pieces contained and saves your countertops from sticky bits.
Can I make these ahead for a party?
Yes, they’re perfect for making a day or two in advance. Keep them refrigerated until serving to ensure the chocolate coating stays firm and the inside stays fresh.
Final Thoughts
If you’re looking for a joyful, delectable treat that feels both nostalgic and new, the Easy Butterfinger Balls Recipe is your new go-to. The perfect blend of creamy, crunchy, and chocolatey makes every bite a celebration. So next time you want to impress with minimal fuss, whip up a batch and watch these little balls of happiness disappear fast!
Print
Easy Butterfinger Balls Recipe
- Prep Time: 15 minutes
- Total Time: 1 hour
- Yield: 24 servings
- Category: Dessert
- Method: No-Cook
- Cuisine: American
Description
These Easy Butterfinger Balls are a delightful no-bake treat combining crushed Butterfinger candy bars with a creamy, sweetened cream cheese mixture, all coated in a smooth layer of melted chocolate. Perfect for parties, holidays, or anytime you crave a sweet and crunchy bite-sized dessert.
Ingredients
Filling
- 2 cups crushed Butterfinger candy bars
- 1 (8-ounce) package cream cheese, softened
- 2 cups powdered sugar
- 1 teaspoon vanilla extract
Coating
- 2 cups semi-sweet chocolate chips
- 1 tablespoon coconut oil or vegetable oil (optional)
Instructions
- Prepare the Filling: Beat the softened cream cheese, powdered sugar, and vanilla extract together until the mixture is smooth and creamy. This creates the base that will bind the crushed candy bars.
- Fold in the Candy: Gently fold the crushed Butterfinger candy bars into the cream cheese mixture until evenly incorporated, making sure not to overmix to maintain some crunch.
- Form the Balls: Roll the mixture into 1-inch diameter balls using your hands, shaping them evenly. Place each ball on a parchment-lined baking sheet for easy handling.
- Freeze the Balls: Place the baking sheet in the freezer and chill the formed balls for 30 minutes. This firms them up, making them easier to coat in chocolate.
- Melt the Chocolate: In a microwave-safe bowl, melt the semi-sweet chocolate chips by heating in 20-second increments, stirring thoroughly after each interval. For a smoother and glossier coating, stir in one tablespoon of coconut or vegetable oil.
- Coat the Balls: Remove the chilled Butterfinger balls from the freezer. Using a fork or dipping tool, dip each ball into the melted chocolate ensuring it is fully covered. Tap off excess chocolate and place back on the parchment-lined baking sheet.
- Chill and Set: Refrigerate the coated balls for 10 to 15 minutes until the chocolate has fully set and hardened, making them ready for serving.
- Serve and Store: Serve the Butterfinger Balls immediately or store them in an airtight container in the refrigerator to keep fresh for several days.
Notes
- Using softened cream cheese is essential for a smooth mixture and easier rolling.
- Adding coconut or vegetable oil to the melted chocolate helps achieve a glossy finish and easier dipping.
- Ensure the balls are well chilled or frozen before dipping to prevent melting the chocolate coating.
- Store leftovers in an airtight container in the refrigerator for up to one week.
- For a variation, you can try using white chocolate chips instead of semi-sweet chocolate.


