
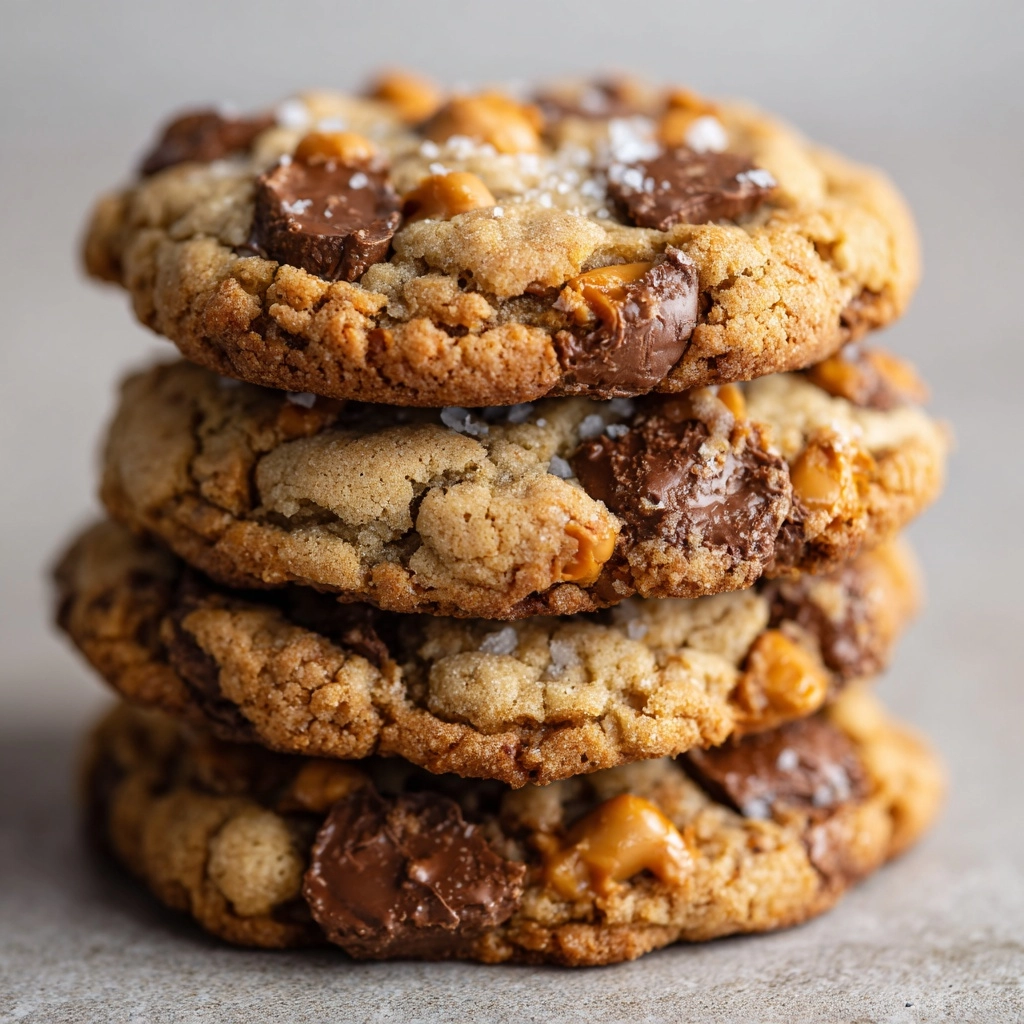
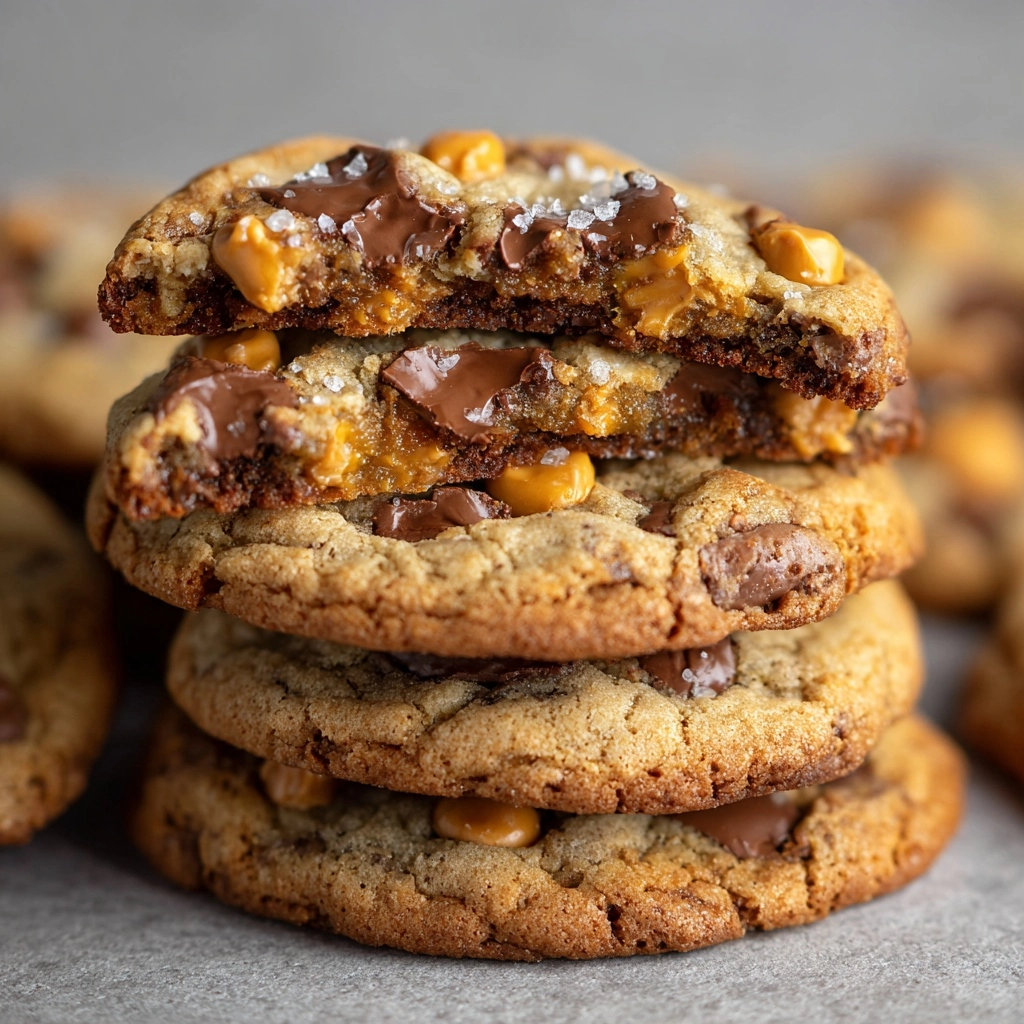
Nothing beats the warm, nostalgic comfort of a cookie loaded with rich peanut butter and crunchy candy bits, which is exactly why the Chewy Peanut Butter Butterfinger Cookies Recipe has become one of my all-time favorites. These cookies deliver a perfect balance of soft, chewy texture with bursts of buttery, crunchy Butterfinger candy that melt in your mouth, making every bite an irresistible treat. If you love peanut butter cookies with a fun twist, this recipe will quickly become your go-to for cookie cravings or special occasions.
Ingredients You’ll Need
Whipping up these fantastic cookies is a breeze with familiar ingredients that work together to create the perfect texture and flavor. Each item plays a unique role, whether it’s giving you that creamy base, adding a lovely golden color, or packing in the candy-packed crunch you’ll adore.
- 1/2 cup unsalted butter, softened: Softened butter keeps the cookies tender and adds rich, buttery flavor.
- 1/2 cup creamy peanut butter: The star of the show, peanut butter gives the cookies their signature chew and nutty essence.
- 1/2 cup granulated sugar: Adds just the right amount of sweetness and helps create a light, fluffy dough.
- 1/2 cup packed light brown sugar: Brings moisture and a slight caramel note that deepens the cookie’s flavor.
- 1 large egg: Binds the ingredients together and helps with the chewy texture.
- 1 teaspoon vanilla extract: Enhances all the flavors with a warm, inviting aroma.
- 1 1/4 cups all-purpose flour: The base that holds everything together in the perfect cookie structure.
- 1/2 teaspoon baking soda: Gives the cookies just enough lift without too much rise.
- 1/4 teaspoon salt: Balances the sweetness and intensifies the peanut butter taste.
- 1 1/4 cups chopped Butterfinger candy bars: Adds that famous crispy, crunchy candy bar bite in every mouthful.
How to Make Chewy Peanut Butter Butterfinger Cookies Recipe
Step 1: Preheat and Prepare
Start by preheating your oven to 350°F and lining a baking sheet with parchment paper to prevent sticking and ease clean-up. This simple prep step sets the foundation for perfectly baked cookies every time.
Step 2: Cream the Butter and Sugars
In a large bowl, beat together the softened butter, creamy peanut butter, granulated sugar, and light brown sugar until the mixture becomes light and fluffy. This creaming process introduces air, which gives the cookies that soft, tender crumb you crave.
Step 3: Add Egg and Vanilla
Next, mix in the egg and vanilla extract until everything is fully combined. These ingredients add moisture, richness, and a fragrant vanilla warmth that rounds out the flavor profile beautifully.
Step 4: Combine the Dry Ingredients
In a separate bowl, whisk together the flour, baking soda, and salt. This ensures that the leavening and seasoning are evenly distributed, so your cookies rise perfectly and taste balanced.
Step 5: Mix Dry Ingredients into Wet
Gradually add the dry flour mixture into the wet butter and sugar mix, stirring gently until a soft dough forms. Be careful not to overmix, as this can make the cookies tough instead of chewy and tender.
Step 6: Fold in Butterfinger Pieces
Gently fold in the chopped Butterfinger candy bars. These chunks create delightful pockets of crunchy, buttery candy in every bite, making the cookies irresistibly fun and flavorful.
Step 7: Scoop and Bake
Scoop the dough into heaping tablespoon-sized balls and space them about 2 inches apart on the prepared baking sheet. Bake for 10 to 12 minutes until the edges are just turning golden and the centers look set but soft. For ultimate chewiness, slightly underbake and let them finish firming up on the pan.
How to Serve Chewy Peanut Butter Butterfinger Cookies Recipe
Garnishes
While these cookies are perfect on their own, adding a light dusting of powdered sugar or drizzling with melted chocolate can make them look extra special for sharing or gifting. A sprinkle of sea salt on top before baking also amplifies the peanut butter flavor wonderfully.
Side Dishes
Pair these cookies with a cold glass of milk, a scoop of vanilla ice cream, or even a hot cup of coffee or tea. The creamy, chilly contrasts of drinks or ice cream bring out the rich, chewy textures and candy crunch in the cookies beautifully.
Creative Ways to Present
Try stacking the cookies with layers of whipped cream or peanut butter frosting to create quick mini cookie sandwiches. You could also wrap individual cookies in parchment paper tied with twine to make delightful homemade gifts for friends and family.
Make Ahead and Storage
Storing Leftovers
Once your Chewy Peanut Butter Butterfinger Cookies Recipe batch has cooled completely, store the leftovers in an airtight container at room temperature. They stay moist and chewy for up to five days, perfect for savoring throughout the week or sharing with loved ones.
Freezing
You can freeze the cookie dough balls before baking by placing them on a parchment-lined tray, freezing until firm, then transferring to a freezer bag. Bake the cookies straight from frozen by adding 1 to 2 extra minutes to the baking time—this makes baking on demand a cinch.
Reheating
If you want that fresh-baked warmth in a snap, pop a cookie in the microwave for about 10 seconds or briefly warm it in a 300°F oven for 3 to 5 minutes. This revives the gooey, chewy texture and melts those Butterfinger chunks just right.
FAQs
Can I substitute crunchy peanut butter for creamy?
Yes, you can use crunchy peanut butter if you prefer a little extra texture, but keep in mind it will add a slight crunch to the dough and might change the cookie’s chewiness a bit.
Do I have to use Butterfinger candy bars?
Butterfinger bars give these cookies their unique crunchy and crispy candy flavor, but if you can’t find them, feel free to substitute with similar crunchy peanut butter candies or chopped peanut butter cups.
How can I make these cookies more soft or chewy?
Underbaking slightly and allowing the cookies to finish setting on the hot pan is key for chewy edges and soft centers. You can also add an extra tablespoon of brown sugar for additional moisture.
Are these cookies gluten-free?
This recipe uses all-purpose flour, so it’s not gluten-free as written. However, you can experiment with a gluten-free flour blend that measures cup-for-cup to make a similar batch suitable for gluten-sensitive eaters.
Can I double this recipe?
Absolutely! Just double all ingredients and use two baking sheets or bake in batches to ensure even cooking and maintain the perfect chewy texture.
Final Thoughts
If you love peanut butter and crave a cookie that’s chewy, candy-packed, and downright irresistible, the Chewy Peanut Butter Butterfinger Cookies Recipe is your new best friend in the kitchen. It’s easy to make, utterly delicious, and guaranteed to impress your family and friends—so don’t wait, whip up a batch today and share the joy of these little bites of happiness!
Print
Chewy Peanut Butter Butterfinger Cookies Recipe
- Prep Time: 15 minutes
- Cook Time: 12 minutes
- Total Time: 27 minutes
- Yield: 24 cookies
- Category: Dessert
- Method: Baking
- Cuisine: American
- Diet: Vegetarian
Description
These Chewy Peanut Butter Butterfinger Cookies are a delightful combination of classic peanut butter cookie softness with crunchy, sweet Butterfinger candy pieces mixed throughout. Perfectly balanced with a rich buttery flavor and a chewy texture, these cookies make an irresistible dessert treat for any candy lover.
Ingredients
Wet Ingredients
- 1/2 cup unsalted butter, softened
- 1/2 cup creamy peanut butter
- 1/2 cup granulated sugar
- 1/2 cup packed light brown sugar
- 1 large egg
- 1 teaspoon vanilla extract
Dry Ingredients
- 1 1/4 cups all-purpose flour
- 1/2 teaspoon baking soda
- 1/4 teaspoon salt
Add-ins
- 1 1/4 cups chopped Butterfinger candy bars
Instructions
- Preheat Oven and Prepare Baking Sheet: Preheat your oven to 350°F (175°C) and line a baking sheet with parchment paper to prevent sticking and facilitate easy cleanup.
- Cream Butter, Peanut Butter, and Sugars: In a large mixing bowl, beat the softened butter, creamy peanut butter, granulated sugar, and light brown sugar together until the mixture becomes light and fluffy, which ensures a tender cookie.
- Add Egg and Vanilla: Beat in the egg and vanilla extract until the wet ingredients are fully combined and smooth.
- Combine Dry Ingredients: In a separate bowl, whisk together the all-purpose flour, baking soda, and salt to evenly distribute the leavening agents and salt.
- Mix Dry Ingredients into Wet: Gradually add the dry mixture to the wet ingredients, stirring just until a soft dough forms. Avoid overmixing to keep the cookies tender.
- Fold in Butterfinger Pieces: Gently fold in the chopped Butterfinger candy bars evenly into the dough, ensuring each cookie will have bits of candy.
- Shape Cookies: Scoop heaping tablespoon-sized portions of dough and place them about 2 inches apart on the prepared baking sheet to allow room for spreading.
- Bake: Bake cookies in the preheated oven for 10–12 minutes, or until the edges are lightly golden and the centers look set but still soft for optimal chewiness.
- Cool: Remove cookies from the oven and let them cool on the pan for 5 minutes to set further before transferring to a wire rack to cool completely.
Notes
- For extra chewy cookies, slightly underbake them and allow the cookies to finish setting while cooling on the pan.
- Store cookies in an airtight container for up to 5 days to maintain freshness.
- You can freeze cookie dough balls and bake them from frozen; just add an extra 1–2 minutes to the baking time.


