
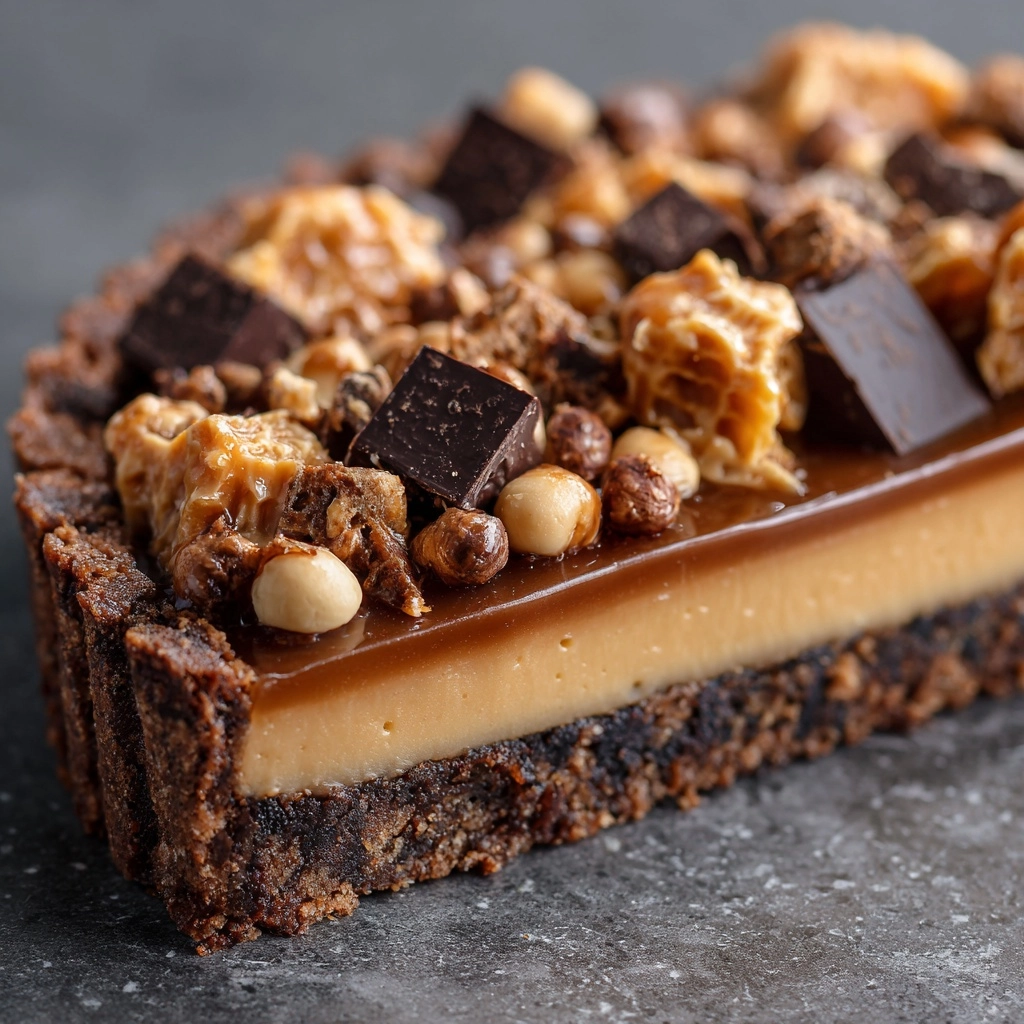
If you’re a fan of rich, creamy desserts that combine the irresistible flavors of peanut butter and honeycomb candy, then get ready to fall head over heels for The Ultimate Peanut Butter Honeycomb Pie Recipe. This no-bake marvel is all about layers of luscious textures—from a crunchy chocolate cookie crust to a silky cream cheese-peanut butter filling studded with crunchy honeycomb bits, topped off with a cloud of whipped cream. It’s playful, decadent, and guaranteed to steal the show at any gathering or cozy night in. Trust me, once you try this pie, it will become your go-to indulgence for every special occasion or just because.
Ingredients You’ll Need
The beauty of The Ultimate Peanut Butter Honeycomb Pie Recipe lies in its simplicity, with each ingredient playing a vital role in building its signature flavor and texture. From the rich chocolate cookie base that provides a perfect crunchy contrast, to the creamy peanut butter filling, every component is essential to making this pie truly spectacular.
- Chocolate sandwich cookies (24 crushed): These form a sturdy yet deliciously chocolatey crust that balances the creamy filling perfectly.
- Unsalted butter (6 tablespoons, melted): Helps bind the cookie crumbs into a firm, buttery crust that holds shape well.
- Cream cheese (8 ounces, softened): Adds a smooth tanginess and creaminess that enriches the peanut butter filling.
- Creamy peanut butter (3/4 cup): This gives the pie its signature nutty flavor and luscious texture.
- Powdered sugar (1/2 cup): Sweetens the filling gently without graininess, blending seamlessly with the cream cheese and peanut butter.
- Vanilla extract (1 teaspoon): A little dash to amp up the flavors and add warmth.
- Heavy whipping cream (1 1/2 cups, divided): Whipped to form fluffy, light layers that make the pie airy and luscious.
- Chopped honeycomb candy (1 cup plus extra for garnish): Adds delightful crunchy bursts of caramelized, honeyed sweetness in every bite.
- Chocolate chips (1/4 cup, melted, optional): For drizzling on top, adding a touch of elegant chocolate flair and extra indulgence.
How to Make The Ultimate Peanut Butter Honeycomb Pie Recipe
Step 1: Prepare the Crust
Start by crushing those chocolate sandwich cookies until they resemble fine crumbs. Then mix them thoroughly with melted butter. This mixture forms the base of your pie, so press it firmly and evenly into the bottom and sides of a 9-inch pie dish. It’s important to refrigerate the crust for about 20 minutes so it sets properly and becomes a firm foundation for your filling.
Step 2: Make the Peanut Butter Filling
In a large mixing bowl, beat the softened cream cheese and creamy peanut butter together until you have a smooth, luscious blend. Adding powdered sugar and vanilla extract next, continue mixing until the filling is silky and perfectly sweetened. This mixture is the heart of your pie, packing all the rich peanut butter goodness you crave.
Step 3: Whip the Cream and Fold It In
In a separate bowl, whip 1 cup of the heavy whipping cream until it forms stiff peaks—this fluffy cream will lighten the dense filling and add a wonderful airy texture. Gently fold the whipped cream into the peanut butter mixture to keep it light and smooth. Then stir in the chopped honeycomb candy carefully to distribute its sweet crunchiness evenly throughout the filling.
Step 4: Assemble the Pie
Spread the creamy peanut butter and honeycomb filling evenly over your chilled cookie crust, smoothing the top with a spatula. In another clean bowl, whip the remaining 1/2 cup of heavy cream until soft peaks form—this will become a soft cloud topping for your pie.
Step 5: Add Toppings and Chill
Spread the softly whipped cream over the top of the pie, then sprinkle with extra honeycomb candy pieces for a stunning finish. If you’d like to get fancy, drizzle melted chocolate over the top for an irresistible decorative touch. Finally, chill the pie for at least 4 hours, or ideally overnight, so it sets beautifully and each slice holds together perfectly.
How to Serve The Ultimate Peanut Butter Honeycomb Pie Recipe
Garnishes
Presentation is part of the fun, and this pie shines when sprinkled generously with extra honeycomb candy right on top, adding a sparkling crunch. A drizzle of melted chocolate not only makes it look restaurant-worthy but adds a rich depth of flavor that pairs wonderfully with the peanut butter. For an extra pop, a few whole chocolate sandwich cookies can be placed around the plate for an inviting dessert display.
Side Dishes
This pie is rich enough to stand on its own, but pairing it with fresh fruits like sliced strawberries or a bowl of mixed berries can provide a bright, tart contrast that balances the sweetness. A cup of strong coffee or a robust black tea also complements the nutty and sweet notes perfectly, cutting through the richness with a warm, bitter finish.
Creative Ways to Present
For a fun party twist, serve The Ultimate Peanut Butter Honeycomb Pie Recipe in individual clear dessert cups layered with extra honeycomb crumbles and whipped cream on top. Alternatively, slice the pie into bite-sized bars and drizzle each with chocolate—perfect for a dessert buffet or to enjoy as little sweet treats. The pie’s vibrant textures and colors make it a showstopper no matter how you serve it.
Make Ahead and Storage
Storing Leftovers
If you have any leftovers (though they might not last long!), cover the pie tightly with plastic wrap or store it in an airtight container and refrigerate. It will keep beautifully for up to three days, maintaining its creamy texture and crisp crust without sogginess.
Freezing
This pie freezes well, making it perfect for preparing in advance. Wrap it securely in plastic wrap, then aluminum foil, and freeze for up to one month. When ready, thaw it overnight in the fridge before serving to preserve all the flavors and textures just like freshly made.
Reheating
Since this is a no-bake, chilled dessert, reheating isn’t necessary or recommended. Instead, let the pie come to just the right chilled temperature in the fridge before serving for the best creamy, fluffy experience.
FAQs
Can I use crunchy peanut butter instead of creamy?
Absolutely! While creamy peanut butter helps achieve a smooth filling, crunchy peanut butter will add delightful texture and extra peanut flavor. Just expect a slightly chunkier bite, which many find enjoyable in this pie.
Is there a gluten-free option for the crust?
Yes, simply swap out the regular chocolate sandwich cookies for your favorite gluten-free sandwich cookies. This substitution keeps the crust delicious while making the pie suitable for gluten-sensitive friends and family.
Can I substitute honeycomb candy with another crunchy candy?
While honeycomb candy is the star for its unique flavor and texture, you could experiment with toffee bits or crushed caramel candies. Just note that honeycomb’s airy crunch and slight honey flavor give this pie its special identity.
How long does the pie need to chill for best results?
To let the flavors meld and the pie set firmly, chilling for at least 4 hours is recommended. Overnight chilling is even better, ensuring perfectly smooth slices and those dreamy textures.
Is this pie suitable for vegetarians?
Yes, The Ultimate Peanut Butter Honeycomb Pie Recipe is vegetarian-friendly, using no gelatin or animal-derived ingredients in the main components. Just check your honeycomb candy’s ingredient list to be sure, as some varieties may vary.
Final Thoughts
Making The Ultimate Peanut Butter Honeycomb Pie Recipe is like treating yourself and those you love to a little jar of pure happiness. It’s easy enough for a weeknight dessert but impressive enough for any celebration. With its mix of creamy, crunchy, sweet, and nutty, every bite is a wonderful adventure. I can’t wait for you to make it your own and share the joy this pie brings around your table!
Print
The Ultimate Peanut Butter Honeycomb Pie Recipe
- Prep Time: 25 minutes
- Cook Time: 0 minutes
- Total Time: 4 hours 25 minutes
- Yield: 10 slices
- Category: Dessert
- Method: No-Cook
- Cuisine: American
- Diet: Vegetarian
Description
Indulge in the rich and creamy Ultimate Peanut Butter Honeycomb Pie, a no-bake dessert that combines a crunchy chocolate cookie crust with a luscious peanut butter and cream cheese filling, studded with sweet honeycomb candy and topped with whipped cream and a chocolate drizzle. Perfect for peanut butter lovers and an easy make-ahead treat.
Ingredients
Crust
- 24 chocolate sandwich cookies, crushed
- 6 tablespoons unsalted butter, melted
Filling
- 8 ounces cream cheese, softened
- 3/4 cup creamy peanut butter
- 1/2 cup powdered sugar
- 1 teaspoon vanilla extract
- 1 cup heavy whipping cream
- 1 cup chopped honeycomb candy, plus extra for garnish
Topping
- 1/2 cup heavy whipping cream
- 1/4 cup chocolate chips, melted (optional for drizzle)
Instructions
- Prepare the crust: In a medium bowl, combine the crushed chocolate sandwich cookies with melted butter. Press this mixture firmly into the bottom and sides of a 9-inch pie dish to form an even crust. Refrigerate for 20 minutes to set.
- Make the filling: In a large mixing bowl, beat the softened cream cheese and creamy peanut butter together until smooth and creamy. Add the powdered sugar and vanilla extract, mixing well until fully incorporated.
- Whip the cream: In a separate bowl, whip 1 cup of heavy cream until stiff peaks form. Gently fold the whipped cream into the peanut butter mixture, blending carefully until smooth and fluffy.
- Add honeycomb candy: Stir in the chopped honeycomb candy evenly into the peanut butter mixture. Spread this filling evenly over the chilled cookie crust.
- Top with whipped cream: Whip the remaining 1/2 cup heavy cream until soft peaks form, then spread it over the top of the pie to create a light, creamy layer.
- Garnish and chill: Decorate the top with extra honeycomb candy and drizzle with melted chocolate chips if desired. Chill the pie in the refrigerator for at least 4 hours before slicing and serving to allow the filling to set fully.
Notes
- For easier slicing, freeze the pie for 30 minutes before serving.
- This pie can be made a day ahead and stored covered in the refrigerator.
- To make it gluten-free, use gluten-free sandwich cookies for the crust.
