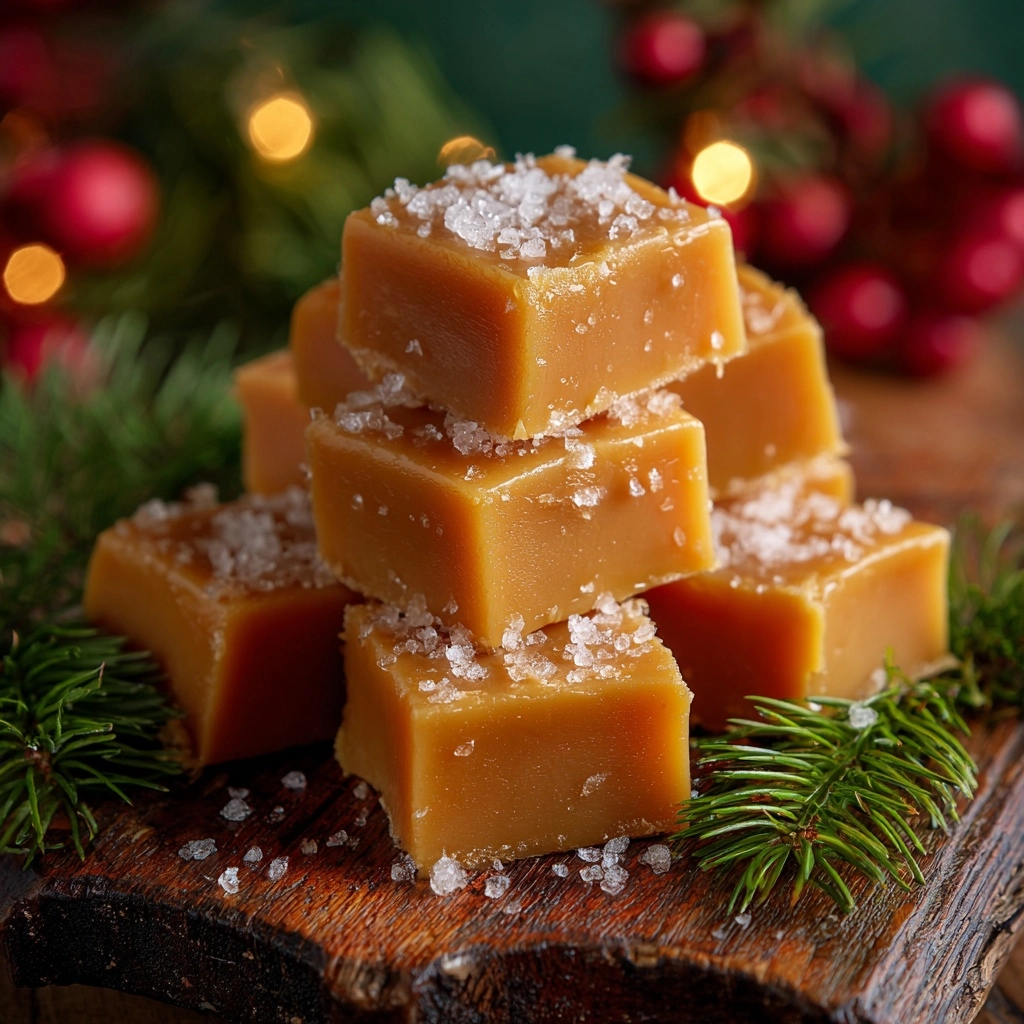
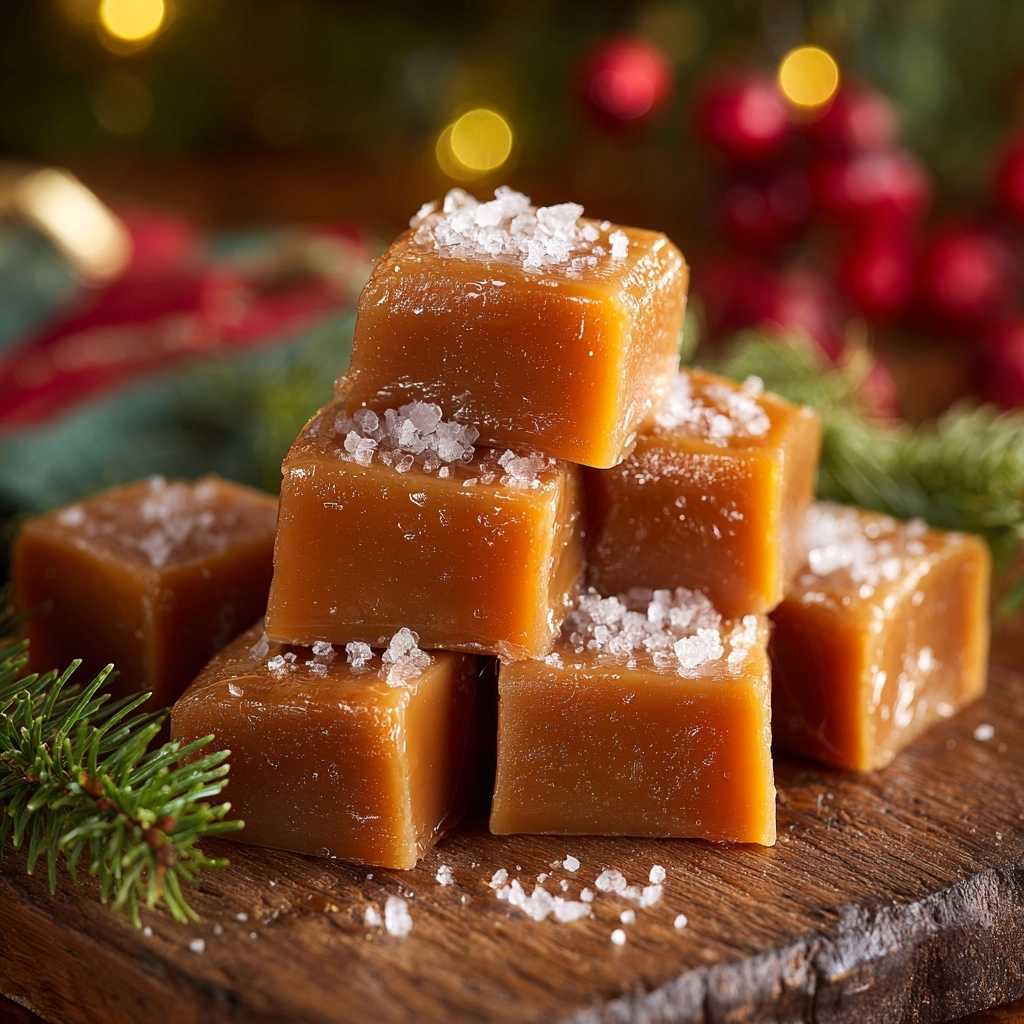
If you are looking to impress friends and family this holiday season with a sweet treat that truly melts hearts, this Homemade Christmas Caramels Recipe is an absolute must-try. These rich, buttery, and irresistibly soft caramels capture the perfect balance of creamy sweetness and a touch of vanilla warmth, making them the ideal festive candy to share or gift. The texture is wonderfully chewy without ever being sticky or hard, thanks to the careful cooking technique and quality ingredients. Once you taste these delightful bites, you’ll understand why homemade caramels are a treasured holiday tradition for many.
Ingredients You’ll Need
This delightful recipe calls for a handful of simple yet powerful ingredients that form the foundation of incredible flavor and texture. Each one plays a vital role from richness to sweetness and even that signature caramel color that makes these treats visually inviting.
- Unsalted butter: Provides a creamy, smooth base and ensures your caramels won’t be too salty, allowing other flavors to shine.
- Light brown sugar: Adds deep, molasses-like sweetness and contributes to the chewiness of the caramels.
- Light corn syrup: Keeps the sugar from crystallizing, ensuring a silky texture throughout.
- Sweetened condensed milk: Enriches the caramel with luscious creaminess and sweetness that sets it apart.
- Salt: A pinch balances the sweetness perfectly and enhances the caramel’s flavor complexity.
- Vanilla extract: Infuses a lovely warm aroma and boosts the overall flavor, making each bite memorable.
How to Make Homemade Christmas Caramels Recipe
Step 1: Prepare Your Pan
Begin by lining a 9×9-inch baking pan with parchment paper, making sure to leave some overhang on the sides. This will make removing the set caramel a breeze and keep your toffee squares looking neat and tidy.
Step 2: Melt the Butter and Combine Ingredients
In a large, heavy-bottomed saucepan, gently melt the cup of unsalted butter over medium heat. Once fully melted, add the light brown sugar, corn syrup, and the entire can of sweetened condensed milk. Stir these ingredients continuously with a heatproof spatula or wooden spoon to blend everything into a smooth mixture.
Step 3: Cook to the Perfect Temperature
This step is where the magic happens. Keep stirring constantly while cooking the mixture until it reaches 245°F, which is known as the firm ball stage in candy making. Using a reliable candy thermometer is essential for success here. This cooking process usually takes about 10-15 minutes and ensures your caramels will have that soft yet set texture.
Step 4: Add Flavor and Pour
Once the caramel mixture hits the perfect temperature, promptly remove it from heat. Stir in the half teaspoon of salt and one teaspoon of vanilla extract to develop that sumptuous flavor profile. Then, carefully pour the hot caramel into your prepared pan, smoothing out the top for an even layer.
Step 5: Let Cool and Set
Allow the caramel to cool completely at room temperature, which usually takes several hours or ideally overnight. This step is crucial as it lets the sugars crystallize properly, giving you that irresistible chew without stickiness.
Step 6: Cut and Wrap
When fully set, gently lift the caramel block from the pan using the parchment paper overhang. Cut your block into 64 small squares, the perfect treat size. Wrap each piece individually in wax paper to keep them fresh and prevent sticking.
How to Serve Homemade Christmas Caramels Recipe

Garnishes
Your homemade caramels shine on their own but sprinkling a tiny pinch of flaky sea salt on top before the caramel sets can create an irresistible salted caramel version. A light dusting of cocoa powder or crushed peppermint candy can also add a festive flair and extra bite of flavor.
Side Dishes
Serve your caramels alongside a warm cup of coffee, hot chocolate, or a creamy chai latte for an indulgent holiday treat. They pair beautifully with seasonal nuts like candied pecans or roasted almonds to balance sweet and savory notes.
Creative Ways to Present
Wrap your Homemade Christmas Caramels Recipe pieces in colorful wax paper or festive tissue and place them in mason jars or decorative tins as thoughtful homemade gifts. You can also layer them between sheets of parchment paper in a pretty box to share at your holiday gatherings – presentation truly amplifies the joy of this classic sweet.
Make Ahead and Storage
Storing Leftovers
Once wrapped, store your caramels in an airtight container at room temperature away from direct heat or sunlight. They will stay soft and delicious for up to two weeks, making them the perfect make-ahead candy for holiday parties and gift baskets.
Freezing
If you want to keep your caramels longer, you can freeze them wrapped in wax paper inside a freezer-safe bag or container. Thaw at room temperature before serving to return them to their soft, chewy perfection.
Reheating
Caramels typically don’t require reheating, but if they become a bit firm after storage, let them sit at room temperature for a short while before enjoying. Avoid microwaving as it may cause uneven melting or stickiness.
FAQs
Can I substitute white sugar for brown sugar in this recipe?
While you can use white sugar, the rich, molasses notes from brown sugar are key to achieving that classic caramel flavor and chewy texture. For best results, stick with light brown sugar.
Do I really need a candy thermometer?
Yes! Reaching the precise temperature of 245°F ensures your caramels set correctly with the perfect chewiness. Without a thermometer, there’s a risk of under or overcooking.
Can I add nuts or other flavors?
Absolutely! You can mix in toasted pecans, walnuts, or even swirl in a little melted chocolate after pouring into the pan for a delightful twist.
How can I make salted caramels?
Just sprinkle flaky sea salt on the caramel surface right after pouring into the pan and before it sets. This small addition creates a delicious sweet-salty contrast.
Is this recipe gluten-free?
Yes, all the ingredients used in this Homemade Christmas Caramels Recipe are naturally gluten-free, making it a great candy option for those with gluten sensitivities.
Final Thoughts
There’s something truly heartwarming about making and sharing your own sweets during the holiday season, and this Homemade Christmas Caramels Recipe perfectly captures that spirit. Not only are these caramels deliciously soft and buttery, but they’re incredibly satisfying to make from scratch. Once you try them, you’ll want to add this recipe to your holiday traditions year after year. So grab that candy thermometer, gather your ingredients, and dive into the joyful world of homemade caramels — your taste buds will thank you!
Print
Homemade Christmas Caramels Recipe
- Prep Time: 10 minutes
- Cook Time: 15 minutes
- Total Time: 25 minutes (plus several hours cooling time)
- Yield: 64 pieces
- Category: Candy
- Method: Stovetop
- Cuisine: American
- Diet: Gluten Free
Description
These Homemade Christmas Caramels are rich, buttery, and irresistibly soft candies perfect for holiday gifting and festive treats. Made with simple ingredients like butter, brown sugar, corn syrup, and sweetened condensed milk, they offer a classic caramel flavor with a smooth, melt-in-your-mouth texture.
Ingredients
Caramel Ingredients
- 1 cup unsalted butter
- 2 ¼ cups packed light brown sugar
- 1 cup light corn syrup
- 1 (14 oz) can sweetened condensed milk
- ½ teaspoon salt
- 1 teaspoon vanilla extract
Instructions
- Prepare the Pan. Line a 9×9-inch baking pan with parchment paper, leaving some overhang on the sides for easy removal of the caramel block once set.
- Melt Butter. In a large, heavy-bottomed saucepan, melt the butter over medium heat to create the base for the caramel mixture.
- Combine Ingredients. Stir in the packed light brown sugar, light corn syrup, and sweetened condensed milk into the melted butter, continuously mixing to ensure even heating.
- Cook the Caramel. Cook the mixture over medium heat, stirring constantly with a heatproof spatula or wooden spoon, until the temperature reaches 245°F (firm ball stage) on a candy thermometer, which takes about 10–15 minutes. This step is crucial for the perfect caramel consistency.
- Add Flavorings. Remove the saucepan from heat and stir in the salt and vanilla extract thoroughly to enhance the caramel’s flavor.
- Pour and Set. Carefully pour the hot caramel into the prepared parchment-lined pan and smooth the surface with a spatula for uniform thickness.
- Cool Completely. Allow the caramel to cool at room temperature for several hours or overnight until fully set and firm enough to cut.
- Cut and Wrap. Using the parchment overhang, lift the caramel block from the pan and cut into 64 small squares. Wrap each piece in wax paper for easy handling and storage.
Notes
- Use a reliable candy thermometer to precisely monitor the cooking temperature and prevent undercooking or overcooking.
- For salted caramels, sprinkle a pinch of sea salt on top of the caramel immediately before cooling.
- Store caramels in an airtight container at room temperature; they keep well for up to 2 weeks.


