
If you have a soft spot for pancakes but want to try something that brings a little international flair to your breakfast table, this Russian Blini (Stuffed Pancakes) Recipe is a delightful choice. These delicate, thin pancakes are like tiny edible canvases just waiting for your favorite fillings—whether it’s creamy sour cream, luxurious caviar, or something sweet like jam. They’re tender yet sturdy enough to hold any stuffing you choose, offering a beautiful balance of classic comfort and elegant tradition. Once you master this recipe, you’ll see why Russian blini are cherished from cozy kitchens to festive occasions.
Ingredients You’ll Need
Ingredients You’ll Need
The beauty of this Russian Blini (Stuffed Pancakes) Recipe lies in its simplicity, where everyday ingredients come together to create something truly special. Each component plays a key role in the batter’s smooth texture and delicate flavor, ensuring your blini turn out perfectly every time.
- 1 cup all-purpose flour: The foundation for your batter, providing structure and a tender crumb.
- 1 ½ cups whole milk (warmed): Adds richness and helps create a smooth, creamy batter.
- 2 large eggs: Bind everything together while contributing to a light, airy finish.
- 2 tbsp melted butter (plus more for cooking): Adds flavor and ensures the blini don’t stick to your pan.
- 1 tbsp granulated sugar: Balances the batter with a hint of sweetness and helps with browning.
- ¼ tsp salt: Enhances all the flavors in the blini without overpowering.
- ½ tsp baking powder (optional): For those who prefer their blini a little fluffier, this works as a gentle lift.
- Assorted fillings: From tangy sour cream to savory smoked salmon or sweetened cottage cheese, these make your blini come alive.
How to Make Russian Blini (Stuffed Pancakes) Recipe
Step 1: Prepare the Batter
Start by mixing the dry ingredients together—flour, sugar, salt, and baking powder if you’re using it. In another bowl, whisk the eggs until pale, then add the warm milk and melted butter. This warmth helps the batter become smooth and silky. Gradually combine the wet ingredients with the dry, whisking until no lumps remain. Letting your batter rest for 15 to 20 minutes is a secret trick that lets the flour fully absorb the liquids, making your blini unbelievably tender.
Step 2: Cook the Blini
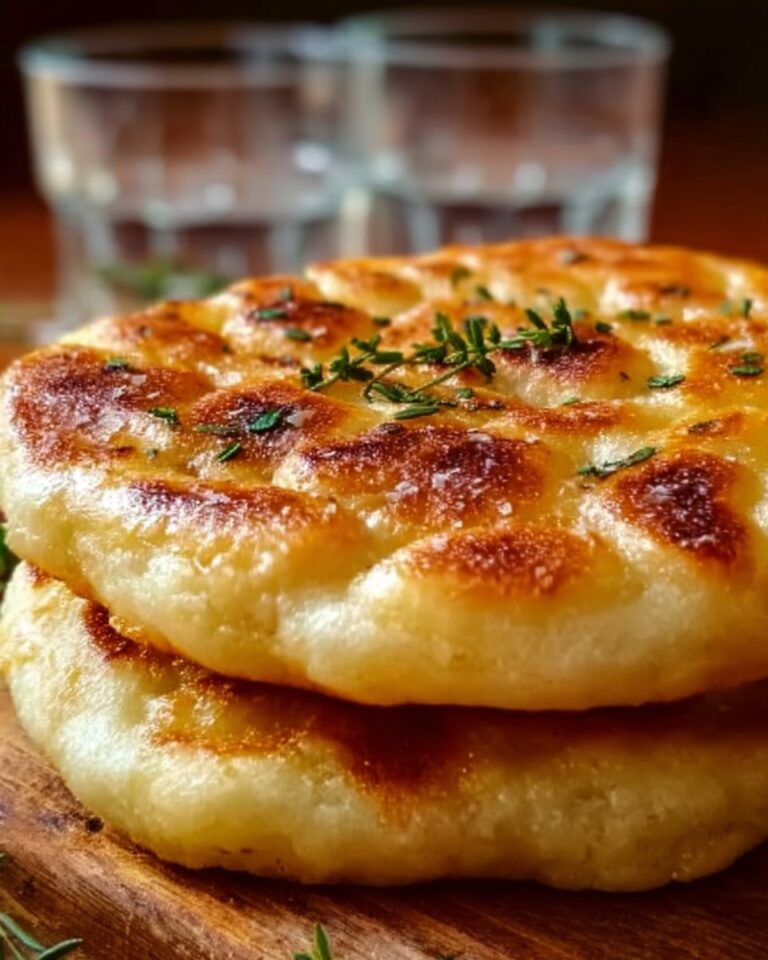
Heat a nonstick skillet or crepe pan over medium heat, then brush it lightly with butter to prevent sticking. Pour about ¼ cup of batter into the pan and immediately swirl it around to form a thin, even layer. Cook for 1 to 2 minutes or until you see the edges lifting gently and the bottom has turned a gorgeous golden brown. Flip carefully, cooking for just 30 to 60 seconds more to finish. Stack the cooked blini on a warm plate as you go, ready for stuffing.
Step 3: Add Your Favorite Filling
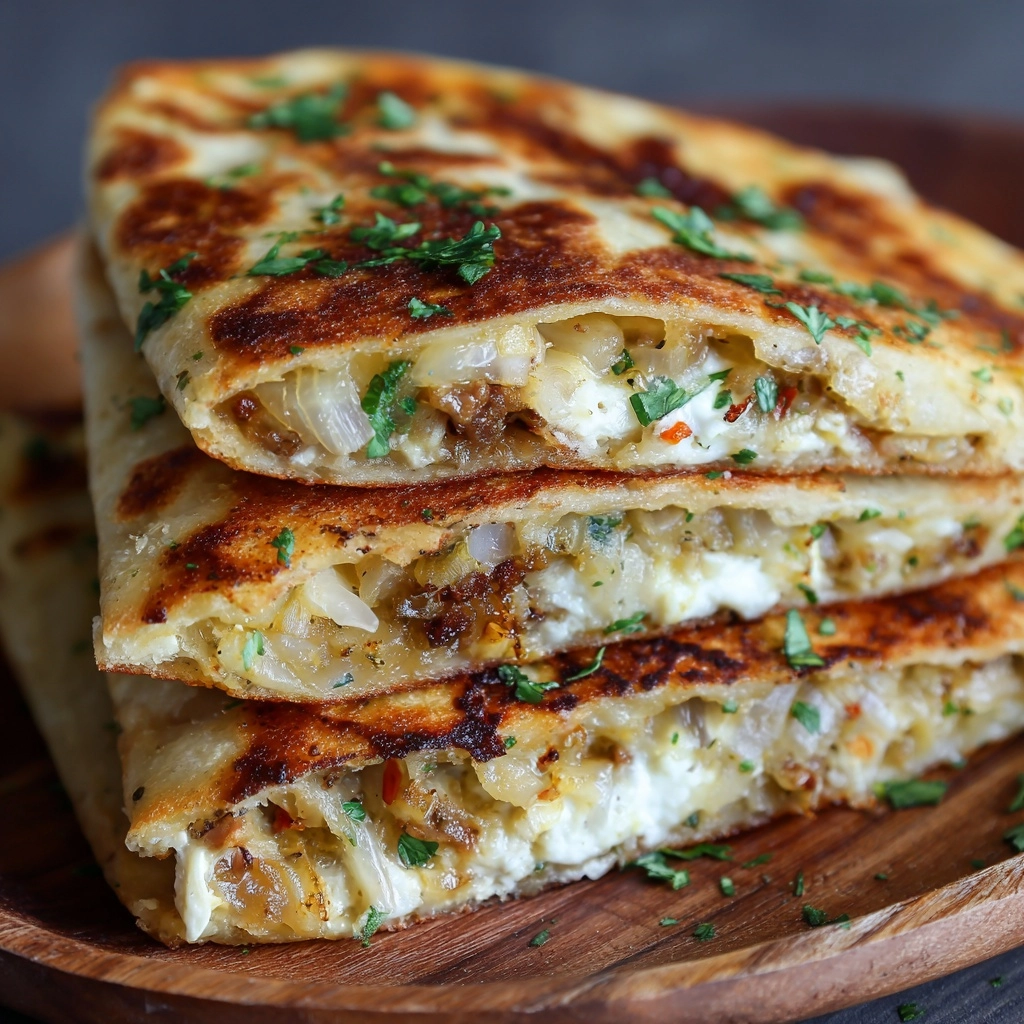
Here’s where the magic happens! Spoon your chosen filling—whether it’s savory options like smoked salmon or sautéed mushrooms, or sweet ones like berry jam—onto each blin. You can roll them up or fold into neat triangles, whatever suits your meal or mood. The warm blini embrace the filling, creating a perfect bite every time.
How to Serve Russian Blini (Stuffed Pancakes) Recipe
Garnishes
Fresh herbs like dill or chives add a bright touch that complements savory fillings beautifully. A dollop of sour cream can provide creamy contrast, while a sprinkle of powdered sugar or a drizzle of honey works wonders with sweet blini. These little extras elevate your presentation and flavor profile effortlessly.
Side Dishes
Consider serving your blini with a fresh cucumber salad or vinegary pickled vegetables for a traditional Russian feel. Something crisp and tart helps cut through richer fillings, balancing the meal and keeping every bite exciting.
Creative Ways to Present
For a fun twist, create a blini platter with assorted fillings and garnishes, inviting guests to customize their own. You could fold the blini into neat little parcels to make elegant appetizers, or stack them layered with cream and fruit for a luscious dessert stack. The versatility of this Russian Blini (Stuffed Pancakes) Recipe means you can always surprise your friends with new presentations.
Make Ahead and Storage
Storing Leftovers
If you find yourself with extra blini, simply stack them with parchment paper in between and wrap tightly in foil or plastic wrap. Stored in the refrigerator, they’ll stay fresh for a couple of days and still taste fantastic when reheated.
Freezing
This recipe freezes wonderfully. Lay individual blini in a single layer on a baking sheet until frozen, then transfer to an airtight container or freezer bag. When you want a quick snack or meal, pop them straight from the freezer to a hot skillet for a few minutes each side.
Reheating
To reheat, gently warm the blini in a nonstick pan over low heat, which helps preserve their tender texture and buttery flavor. Alternatively, the microwave works fine if you’re in a hurry, but do so in short bursts to avoid drying them out.
FAQs
What is the difference between blini and regular pancakes?
Blini are thinner and lighter than typical American pancakes, resembling delicate crepes but with a slightly denser texture. They’re made with yeasted or chemical leavening for lift and often served with savory or sweet fillings, making them more versatile than standard pancakes.
Can I make Russian Blini (Stuffed Pancakes) Recipe without eggs?
Eggs play a crucial role in binding and texture here, but you can try substitutes like flax eggs or commercial egg replacements if needed. Keep in mind the batter may be a bit less tender or elastic, so adjust cooking times carefully.
What are some traditional fillings for Russian blini?
Classic fillings include sour cream topped with caviar, smoked salmon with dill, sautéed mushrooms, sweetened cottage cheese, or fruit preserves. These combinations celebrate the balance of savory and sweet that blini are famous for.
How thin should Russian blini be?
Ideally, blini are very thin—almost like a delicate crepe—so you want to pour just enough batter to coat the pan in a thin layer. This creates a soft, flexible pancake that can be easily rolled or folded with fillings inside.
Is this Russian Blini (Stuffed Pancakes) Recipe suitable for vegetarians?
Absolutely! By choosing vegetarian fillings such as mushrooms, cottage cheese, or jams, this recipe is fully vegetarian-friendly. Just swap out any non-vegetarian toppings, and you have a delicious meal or snack everyone can enjoy.
Final Thoughts
There is something truly special about making Russian Blini (Stuffed Pancakes) Recipe at home—it’s like stepping into a world of comfort and tradition with each tender bite. Whether you stick with classic fillings or get creative, these pancakes will become a cherished addition to your recipe collection. Give them a try and watch how effortlessly they bring warmth and joy to your table.
Print
Russian Blini (Stuffed Pancakes) Recipe
- Prep Time: 20 minutes
- Cook Time: 20 minutes
- Total Time: 40 minutes
- Yield: 10 blini
- Category: Breakfast
- Method: Stovetop
- Cuisine: Russian
- Diet: Vegetarian
Description
Traditional Russian blini are thin, delicate pancakes made from a simple batter of flour, milk, eggs, and butter. These versatile pancakes can be filled with a variety of savory or sweet fillings such as sour cream, caviar, smoked salmon, sautéed mushrooms, sweetened cottage cheese, or jam, making them perfect for breakfast or any time you crave a delicious, satisfying treat.
Ingredients
Batter Ingredients
- 1 cup all-purpose flour
- 1 ½ cups whole milk, warmed
- 2 large eggs
- 2 tbsp melted butter, plus more for cooking
- 1 tbsp granulated sugar
- ¼ tsp salt
- ½ tsp baking powder (optional for fluffier texture)
Optional Fillings
- Sour cream
- Caviar
- Smoked salmon
- Sautéed mushrooms
- Sweetened cottage cheese
- Jam
Instructions
- Prepare the dry ingredients. In a mixing bowl, whisk together the all-purpose flour, granulated sugar, salt, and baking powder if using. This ensures the dry ingredients are evenly distributed before combining with the wet ingredients.
- Mix the wet ingredients. In a separate bowl, beat the eggs thoroughly and then add the warmed whole milk and melted butter. Whisk together until combined smoothly.
- Combine wet and dry mixtures. Gradually pour the wet ingredient mixture into the bowl with the dry ingredients, whisking continuously until you achieve a smooth, lump-free batter.
- Rest the batter. Let the batter rest for 15 to 20 minutes. This step allows the flour to fully hydrate and results in tender blini.
- Heat the pan and prepare for cooking. Place a nonstick skillet or crepe pan over medium heat and lightly coat it with butter to prevent sticking and add flavor.
- Cook the blini. Pour about ¼ cup of batter into the hot pan, swirling the pan to spread the batter into a thin, even circle. Cook for 1 to 2 minutes until the edges start to lift and the bottom turns golden brown.
- Flip and finish cooking. Flip the blin carefully and cook for an additional 30 to 60 seconds until lightly golden on the other side. Remove from the pan and place on a plate.
- Repeat cooking. Continue cooking the remaining batter in the same way, adding butter to the pan as needed.
- Fill and serve. Once all blini are cooked, fill each with your preferred savory or sweet fillings such as sour cream, caviar, smoked salmon, mushrooms, cottage cheese, or jam. Roll or fold the blini as desired and serve warm.
Notes
- Blini can be made ahead and gently reheated in a skillet or microwave before serving.
- They freeze well; separate layers with parchment paper and store in an airtight container for up to 2 months.
- Experiment with both sweet and savory fillings to create a traditional Russian spread suitable for any occasion.


